Thursday, July 30, 2015

Vacation 2015


Well, I’ve been back at work for almost two weeks now and I haven’t managed to write a single post about my vacation projects or anything else either – bad blogger – busy summer.

I planned six – yes SIX – projects to complete during my vacation.  We got three done and one of them actually isn’t fully complete yet.  Today I am going to write about the biggest of my vacation projects – the front entrance.

Back in 2005 I wrote about the front entrance for my CBA portfolio.  I explained how I wanted the entrance to be a welcoming, comfortable and functional space.  Here’s the pdf version of that portfolio entry if you want to read the whole thing.  CCC-entrance

Looking back at it now I have to laugh at the line about it being painted a ‘bright mauve colour’ – that certainly wasn’t welcoming.  I would never purchase paint that colour – it was some old paint that was left here by the previous homeowners.  Even as ‘free’ paint it was putrid and the entrance didn’t stay that colour for long.

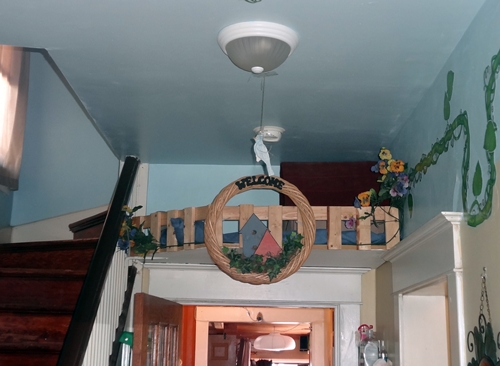
My newly renovated entrance is much more inviting.  We even added a ‘Welcome’ sign up on the cats’ loft because even Mali and Malta love to greet the children in the morning;

15-07-entrance01


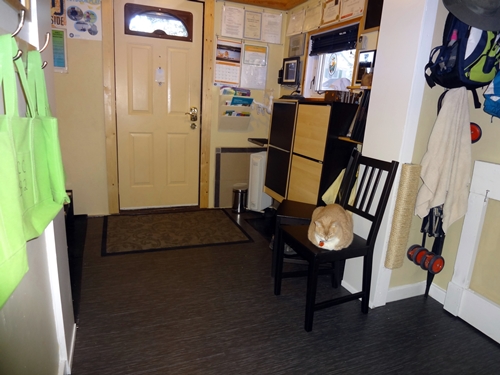
You’ll often find Mali waiting in the entrance for visitors to arrive.  Here she’s trying out one of the new chairs;

15-07-entrance02

Only by going part way up the stairs can I get most of the entrance in a single photo;

15-07-entrance03

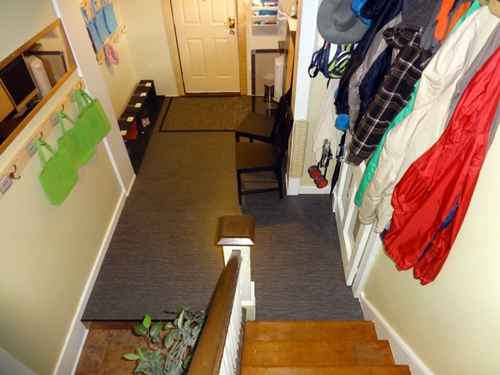
I put the toddlers’ name tags on their bench so they can sit on their ‘spot’ without having to turn around and see which hook is theirs.

The East side of the entrance has some information for parents, storage for extra clothes, the digital picture frame with photos of the children ‘in action’, and the new addition – a relaxing fountain which the children love but I tend to turn off once everyone has arrived because the sound of constant running water becomes very irritating distracting.

15-07-entrance04

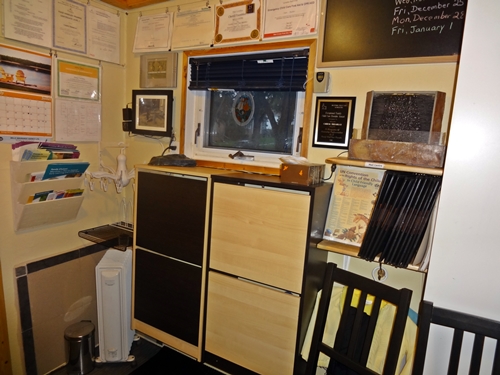
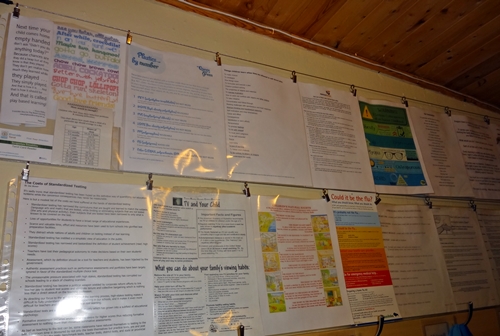
The old magnetic bulletin board on the West wall was also annoying because gusts of wind from the door would blow the magnets and papers off the board.  I now use wires and these handy hooks from Ikea;

15-07-entrance05

The parents are thrilled by the new entrance – the children prefer some of the other new spaces but that’s another post.

Friday, July 3, 2015

Loftless

Only one more day before my ‘vacation’ begins and of course I have some big projects planned.  I am usually very busy during my vacation and often go for several days without turning my computer on even to check email therefore it is highly unlikely that I will be writing any blog posts. So, before I get too busy to write I wanted to briefly tell you about a ‘little’ project that has been keeping me busy for the last few weekends.

You may remember back in December I wrote about the various lofts we have had in our play space over the past ten years.  In that post I explained that we were no longer using the loft as part of our play space but would instead use that space for additional storage.

 
Admittedly it was a very convenient spot to store cots, bedding, books, toys, and other bulky items.  In fact, it may have been too convenient to store things in the loft.  As more and more things got tossed into the loft it was becoming apparent that getting anything out of the loft was going to be a major ordeal.  So, although it was not on my list of ‘fun weekend projects’ I resigned myself to the task of cleaning out and reorganizing the loft storage space.
 Then there was another interesting development.  My oldest still-living-at-home son decided to move into his own apartment and took a bunch of his stuff leaving empty space.  So, I reorganized the basement toy storage area along with the loft storage area and when I was done there was nothing left to store in the loft!

An empty loft doesn’t really use up any floor space but it is an awfully big item in a small room and if it is not needed why not take it down.  Now, taking it down is not a simple project when there are other items in the room that are attached to the loft.  Once I had decided that the loft was going my first step was to make a plan for how to rearrange the items that were going to be remaining.  Things like the block bin which was constructed between the upright supports for the loft – it was going to have to be rebuilt as a freestanding unit.

It was a somewhat slow process that was done in small phases over several weekends.  The playroom went from this ‘using the loft for storage’ space;

 
  to this temporary arrangement with an almost empty, partially dismantled loft;
 
15-07-loft03-1 

And it is now a completely loft free zone;

 
 Here is another view of the new loftless space;
 
15-07-loft04-2 

There is still a lot of finish work yet to be done and I have to decide what to do about the flooring – that was going to be a separate blog post but this renovation forced me to remove the old mats earlier than planned and I still don’t know what I’m going to replace them with.  For now we’ll just have to make due with what we have because I have bigger things planned for my vacation. :-)