Warning - I think this might be a long post but I
don't want to try to break it up into two or three smaller posts.
Persevere through the rambling history - it will be worth it, I
promise...
Often
my husband complains
people comment that I am always building/making something but really I
am always moving/changing something. Inside and outside my childcare
home I create the furnishings, equipment, lofts, storage units etc to
fit a specific space or purpose to suit the interests/needs of the group
of children enrolled at that time. Sometimes there are items in stores
or catalogues that I like but the dimensions or features are wrong for
my application so I draw a plan and make one that will work.
Sometimes
I feel my projects may seem incomplete/unfinished - maybe I didn't have
enough time to complete my vision due to inclement weather or other
delays. Possibly the project has several phases or there was something I
forgot to take in to consideration when I made the plan. I've taken
down shelf units and discovered that the wall behind them was a color
that is no longer on any other wall in the house and I have had neither
the time nor any extra paint to fix it. That's OK because for me
everything is really just temporary - it may not be long before I devise
another plan that will require another change and that wall will be
covered again. The original project may even be abandoned entirely in
favor of a better idea.
When I remove something from the play
space I rarely discard any of the pieces - there may be another use for
them at another time. Sometimes I've even secretly dug a piece or two
of scraps from the cut off bin that I felt were too valuable to have
been put there. It drives me crazy to watch those home renovation shows
when they take a sledge hammer to the place and destroy perfectly
usable parts. Go ahead, label me a 'hoarder' but I can't count the
number of times I've said something like "You know what I need here...
wait... I've got something in the basement/shed/bin that just might
work". Occasionally I even 'attach' items that are not really needed at
the time but it is easier than finding a place to store the extra
pieces. It is better for the environment if I can reuse something.
Besides, I find shopping for new stuff is so time consuming, often
stressful and definitely more expensive.
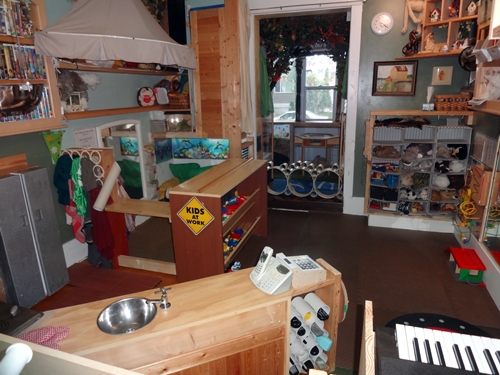
This spring/summer I have
changed at least a portion of every part of our indoor and outdoor play
spaces. In fact, I just looked at the slideshow on my homepage and
realized that NONE of the spaces pictured there exist anymore! Yet, for
all my recent projects and changes I estimate the total cost of
supplies to be less than $300 - that is a small price tag for a fairly
major renovation. Of course, that doesn't cover what labour costs might
be if I didn't consider renovating to be an exciting recreational
activity - I'd rather be in the midst of a construction project than
traveling or laying on a beach any day! That comment now leads
perfectly to the real topic of this post;
'What I Did on My Vacation - 2016 Edition'.
This
year the bulk of the work was done to the outdoor play space - hooray,
plenty of outdoor time! There were several preliminary projects that
were done earlier in the spring. The biggest of those involved moving
the garden - this couldn't wait until vacation time because our
seedlings needed to be planted earlier than mid-July so the garden phase
was started in May. For a while the old and new garden spaces were
only partially finished and had to wait for other project phases to be
done. The most noticeable change took place during the first week of
July - the removal of what was left of the shed.
Here is a little
shed history. The original 8 x 10 backyard shed was built a long time
ago - I'm not even certain of the exact year but I'm going to estimate
that it was about 1999. My husband designed it and the entire space
belonged to him - the children and I used only the 12'x30' ground level
deck, the gravel area and a small storage shed beside the upper deck.
In 2009 when I wanted to plant a garden we disassembled the entire shed
and then reassembled it on top of the deck adjacent to my little shed.
This enabled me to use the ground space where my husband's shed had been
in exchange for a portion of the deck that we rarely used.
That worked for several years until 2013 when we moved
half
the big shed to the side yard. The side yard shed contained the tools
and allowed my husband to work in his separate side yard space
at the same time as
the children and I were playing in the back yard. There wasn't room for
the whole shed in the side yard so we left half of it on the back deck.
Last summer we put windows in remaining section of the backyard shed
thinking maybe it would make a good playhouse type space. However, it
was only used maybe three or four times in the past year and I felt the
open deck space would be more beneficial so down it came. Of course
I've safely stored the windows and all the other usable parts too.
Throughout
all these shed projects the only time we purchased new wood was when we
didn't have old pieces that were long enough. Consequently there was a
lot of nostalgia as the shed was disassembled. I found grey boards
from the original shed, green and purple boards from the old wooden play
structure, white boards from the old fence, black pieces from the old
wooden wagon and even a couple dark brown stained pieces that may have
even been from the shed at our old house!
So, I bet you are
wondering what the 'new' back yard looks like. You're probably getting
tired of just words so how about a bunch of pictures with just a few
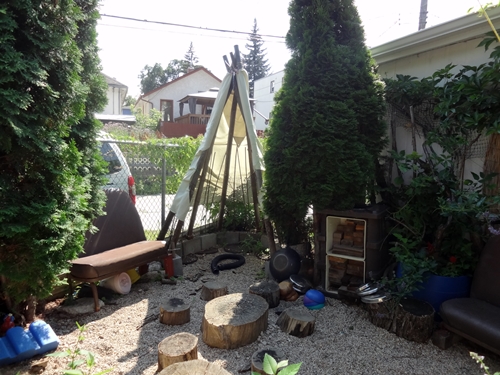
words. Here is the view of the gravel area from the 'new' entrance;
And a closer view of the tipi corner;
This
is where the entrance to the gravel area used to be - I always had to
trim the willow back so we could get by. Now I can let it grow and it
makes such a cozy seating area (you can hardly see the benches in the
corner). The cinder block 'chalk wall' was extended too;
Here's another view of that corner;
This is the new little 'bridge' entrance to the gravel area;
The
entrance to the gravel area was moved to make way for the new garden
space so all these projects were done in May. This is what our new
garden looked like in June - peas, beans, corn, peppers, tomatoes, wheat
and flax;
And in July;
From the other side;
Here's
the new seating/play area where the old garden had been. The children
call this the 'trampoline' because the thick layer of mulch is spongy to
walk/run on. Part of the old garden is still here - Milkweed and
herbs.
Here is what you see if you sit on the benches and look toward the gravel area;
This
is Frank - a friend I made when we first began the shed demo. I kept
moving him to safer places so he didn't accidentally get squished.
So
beautiful and friendly. Kept distracting me. Almost forgot to take
the 'before demo' picture. Here's an 'already started but still mostly
there' picture;
The new open, freshly painted deck space after shed demo - all this space was under the shed in 2009 and half in 2013;
Combination
wooden bench/balance beam/toddler table/moveable space divider and also
a fun little fold-up/down table (extra parts). This is the same camera
angle as the 'before demo' picture.
View of new space from the gravel area;
Wood, gravel, garden, mulch - texture everywhere :-)