Showing posts with label Recipes. Show all posts

Saturday, October 30, 2021

Apple Burgers

One of my childcare families asked for this recipe recently and I replied that it was ‘on the list of future posts’. I actually have a list of blog posts waiting to be written…lack of post ideas is not the reason for the long periods of time between posts. Sometimes I just need a a nudge to move a post to the top of the list and get busy writing.

As I mentioned in my last post, this past summer we didn’t follow our regular four-week-revolving menu. Instead, I had made a list – yes, another list – of new recipes I would like to try without necessarily adding them to our regular menu. Apple Burgers were one of the new recipes that the children requested multiple times over the summer and asked to have added to the regular menu permanently.

In the spring, when I first started going through my recipe books to make the ‘new recipes’ list, I almost skipped reading the Apple Burger recipe…again. I say ‘again’ because all my recipe books are more than 20 years old, some may even be older than me. There are no pages in any of my recipe books that I have never looked at but there are definitely recipes that I have not read past the title.

Apple Burgers fell into the ‘skipped’ list because I don’t generally like apples. I mean, I won’t entirely refuse to eat them – like seafood (gag) – but anything apple would be near the bottom of a list. Like on my ‘pie list’ all other fruit pies and most meat/veggie pies would be ahead of apple pie. So, my initial response to reading the title ‘Apple Burgers’ would be ‘eww, why wreck a burger by putting apple on it’ and I would turn the page.

However, this time I read it – after all, I was looking for recipes for lunches for the children and even most of the picky eaters will eat apples. I discovered that ‘Apple Burgers’ are really just chicken/turkey burgers with applesauce in them. MMmmm, chicken and turkey are pretty high up on my list so Apple Burgers got added to the summer recipes to try list.

Now, I will first post the recipe ingredient list as it was originally written with the usual disclaimer that I have NEVER followed a recipe without modifying it. Then I’ll try to guess at what I really did since I don’t measure ingredients.

Apple Burgers
  • 1 lb ground chicken (or turkey)
  • 1/2 cup applesauce
  • 2 tbsp chopped onion
  • 2 tbsp chopped red pepper
  • 1/4 tsp salt
  • 1/8 tsp pepper

After reading the original recipe my first thoughts were; 1) the children will not even try these if they see a piece of onion or red pepper, 2) there is not nearly enough seasoning/flavor, and 3) why is there no egg or breadcrumbs?

So, when I made them I added the things I thought were missing – and I have done it differently each time I have made them so I don’t really have a ‘recipe’. Seriously, I just play with food like the children mixing potions with loose parts…as long as it is edible I’ll consider throwing it in a ‘recipe’. Also note, I am cooking for a big group so I usually start with double the above recipe. These are some of the other modifications I have made.

First, I add a lot more seasoning. I have dried vegetable seasoning (onion, peppers, garlic) that I add to things like scrambled eggs or herb bread etc when I want the flavour but not the chunks or moisture from chopped or pureed onions and peppers. I have used the dried vegetable seasoning in these burgers and I have also used oregano, thyme, rosemary – total of probably at least two or more tablespoons of various dried seasonings. Sometimes I add bacon bits, soya sauce, BBQ sauce, or Thai sweet chili sauce.

Second, I add an egg and some cornmeal/oatmeal/breadcrumbs. Actually, never breadcrumbs, I don’t buy or make breadcrumbs but they would work too. I usually add cornmeal to all my ground meat loaves/balls/burgers. Sometimes I use oatmeal though I put it in the food processor first because I only buy whole oats and they would make the burgers chunky if I didn’t grind up a bit it first. If I am adding pureed onions and peppers I will put the oatmeal in the food processor at the same time.

How much cornmeal/oatmeal? I have no idea, I just dump it in straight from the bag, maybe a cup? Normally I would add enough to enable me to handle the mixture and form patties but honestly every time I have made these I feel like I’m adding way too much filler and they have still been too wet to handle. I have spooned the mixture onto a parchment paper lined baking sheet like a drop cookie, shaped them a bit and then baked them. I usually get 16 smallish patties out of a recipe starting with 2 lbs ground chicken.

The original recipe says to broil them 8 minutes per side until no longer pink. Hmpf – too wet to put on my broiler pan – would make rippled burgers LOL. I bake them for about 25-30 minutes at 375 F on my oven’s convection roast setting (400F on regular setting) flipping after about 15-20 minutes so they brown a bit on both sides. I always use a thermometer to ensure min internal temp of 165F/74C. They always set up very solid, never crumble so I don’t know why they are too wet to handle raw.

AAannnd – no picture. That is probably why I kept putting off writing this post. I have never remembered to take a picture of the Apple Burgers – too busy eating them. I let the children choose the condiments they want on their burgers. For me, it is mayonnaise and Thai sweet chili sauce for extra flavour.

In lieu of an apple burger pic – here are some barbecued beef patties my husband cooked for me (I’m a little fearful of the gas BBQ thingy). I’m always sad when he doesn’t BBQ beef burgers ‘crispy’ enough for me so he cooked these ones special just the way I like them…


Friday, January 1, 2021

Hamburger Tarts

When discussing menu items in my childcare home ‘favourites’ can be defined in many ways. It could be a meal that all of the children eat at least some of and no one refuses to eat. It could also mean that some of the children really enjoy it and consistently ask for seconds but there may be one or two children who barely eat any at all. After all, not everyone likes the same things.

Sometimes it may be defined as one of my favourite things to make because it either doesn’t require a lot of work or it can be prepared well in advance and baked for lunch. I always prefer meals that don’t add to the already busy lunch time – between returning from outdoors and getting ready for nap time there is already a lot to do without including food prep.

Hamburger Tarts are one of the items that tick a lot of boxes. They require a bit of fairly easy prep early in the morning before the children arrive and then bake a bit just before we come in from outside. Most of the children like them – some don’t – some ask for seconds. Personally I find them addictive and left unchecked I could wipe out the whole batch because seriously – bread, meat and cheese is really just like pizza which I could eat all day every day.

This is the ‘original’ recipe which of course I only use as a starting point and then modify – a lot.

First of all, I don’t fiddle with cutting crusts (best part) off bread, buttering the slices and pressing them into muffin tins to essentially make more crusts. I use yummy brioche buns, placed upside down in a 9×13 pan, and hollowed out (keep for free bread crumbs). I have also tried this step using scratch made bread dough pressed in the pan and using a cup to make 12 indents for filling – good too but it requires much more effort and time and most of the children prefer the brioche buns

For the filling I do saute the onion and lean ground beef though I use much more than half an onion – more like one very large or two medium and very well cooked before adding the beef. One lb of ground beef will fill 12 buns. I never use the yucky mushroom soup – usually tomato soup or cheddar cheese soup.

I add all the saved ‘bread crumbs’ from the buns, eggs, and ketchup as well as some mustard and BBQ sauce too. I don’t usually grate the cheddar cheese to add to the filling. To save time I most often just place a thick square slice of cheddar in the bottom of each bun cup before filling with the meat mixture. At this point I cover with foil and refrigerate until closer to lunch time then bake covered at 325F for about an hour to heat through. Uncover for the last bit of time to brown a little without drying out.

Serve with salad or coleslaw – pick them up and eat like a burger or cut them up and use a fork (not as fun) – Mmmmm good.


Saturday, October 17, 2020

Recipe Requests

After my last post about our new menu there were a few requests to post some recipes – an easy post but it still took me a month to get around to it. I think my increased procrastination may be due in part to my lack of early morning trips to the gym. I miss those 4 AM workouts that were always a great way to get energized for a productive day.

The first request was for ‘Texas Hash’ which was pictured in my last post. I rarely measure anything so all my recipe amounts are only approximations. I also buy a lot of things in bulk when they are on sale and I have time to cook and package them in meal sized portions. I always have a variety of cooked meats in my freezer ready to add to casseroles, stir fry’s, sauces etc so this step is not in most of my recipes.

Texas Hash

Dice 2 large onions and 5 green/red peppers, cook until tender.  Add 1 can tomato sauce/puree/soup (roughly 300 ml?), 1 lb cooked ground meat/soy protein, 1 cup frozen corn, and 3 Tbsp taco seasoning.  Simmer until heated through.  Cook 2 cups rice (I use brown jasmine or basmati) in 4 cups water and then add to warm sauce mixture.  Serve now or put in casserole dish to keep warm or reheat later. Pictured below: first just sauce mixture before rice added and second plated with jasmine rice added (sorry, blurry pic). Note: I rarely use beef, usually soy protein of pork.

Meatloaf

In a large bowl soak corn meal in milk (I’m guessing 1/2 – 3/4 cup of each but I have never measured it). Add 1 pkg onion soup mix, 1 egg, salt, and 1 tsp of liquid smoke. Mix. Add 3 kg ground pork (I buy the chub pack from Costco). Mix well and press in to 9×13 pan. Bake in 325F oven for roughly 90 min until centre tests to 74C. I cut the cooled slab into three 9×4 inch ‘loaves’ and package for the freezer until needed.

Rate this:


Tuesday, August 16, 2016

Taco Pie

Today I want to highlight one of our lunch menu items.  A long time ago I used to have chili buns on the menu - they were popular but any meal items that need to be assembled on the individual plates I find are too time consuming.  I much prefer to prepare 'all-in-one' meals like Layered French Toast that can be prepared in advance and are easier to serve to a group.

Taco Pie is like that - essentially a chili bun casserole type meal - perfect.  In the morning I start by making chili;

  • 1 796 ml can diced tomatoes
  • 1 540 ml can of black beans
  • 1 284 ml can of tomato soup
  • 1 lb ground beef, scramble fried
  • 1/4 cup taco seasoning (approximately - maybe more - I don't measure it, I just dump some in until it looks/smells right).
  • salt, pepper, chili flakes, paprika, (to taste)
  • Salsa (optional - sometimes I add some, sometimes I don't, never measure)

These all simmer for an hour or so while I grate cheese, prepare the crust and do any other necessary tasks before the children arrive.  This is the biscuit crust recipe - this I measure;

  • 4 cups whole wheat flour
  • 8 tsp baking powder
  • 1 1/2 tsp salt
  • 1/2 cup mayonnaise
  • 1 1/2 cups milk

Stir dry ingredients together in a bowl.  Make a well in center and pour in milk and mayonnaise.  Mix to moisten and then press into bottom of a greased 9x13 baking pan.  Bake in a 400 degree oven for 20 minutes.  Remove from oven, sprinkle crust with grated cheese, pour chili over top, cover with crushed corn chips and some more grated cheese.

At this point I suppose you could just bake it a little longer to melt the cheese and then serve it but because I prepare it very early in the morning I cover it with foil and put it in a 175 degree oven until lunch - it is ready for us whenever we are done playing.

DSC02789

Tuesday, February 2, 2016

A Compilation

Every once in a while I find I have collected a few photos from activities that don't become a blog post on their own but I'd still like to share them.  These are a few from the past month;

This was the result of nearly an hour of independent play after we got past the 'There's nobody else here to play with me' stage;

16-02-misc01

Here is a picture of a cooperative game these two enjoyed;

16-02-misc02

I thought this was a pretty amazing tower built by a three-year-old;

16-02-misc03.JPG

And this two-year-old sorted these blocks like this several times, every day for more than a week!

16-02-misc04

Finally, this was something I made to use some extra acorn squash.  It was definitely not my favourite squash dish but it had the preschoolers clamoring for more.


16-02-misc05
  • 3 cups acorn squash, cubed
  • 1/2 cup applesauce
  • 1/2 cup raisins
  • 1/4 cup honey
  • 1 Tbsp margarine, melted
  • 2 tsp lemon juice
  • 1/4 tsp cinnamon
Mix all ingredients together and place in a greased baking dish. Bake, covered, in preheated 375 F (190 C) oven for 30 minutes; uncover and bake for another 20 minutes or until squash is tender.

Tuesday, October 20, 2015

Lumpy Dough

Play dough and other sensory materials are very popular with children of all ages.  I like play dough because unlike paint and many of our other sensory activities there is little set-up time required for play dough.  I always have a batch of prepared play dough stored in my refrigerator.  The fact that it is cold at the beginning of the activity and warm at the end is an added sensory experience.

The recipe I like to use most often is;
  • 1 cup flour
  • 1 cup water
  • 1/2 cup salt
  • 3 Tbsp cream of tartar
  • 2 Tbsp vegetable oil
Combine flour, salt and cream of tartar in a medium sized saucepan.  Add water and oil: cook over medium heat stirring constantly.  When mixture pulls away from side of pan and forms a large ball, remove from heat and let cool.  Knead dough, divide and add food colouring if desired.


I do usually add some time of colouring to the dough and sometimes I add herbs, spices or some other scented material as well.  I have plenty of tools to use with play dough – knives, scrapers, icing decorators, cookie cutters etc but I find that many of the children become so focused on tool ‘ownership’ that the play dough gets forgotten.  Since this is a ‘process’ activity there is never a required product so I rarely offer tools unless the children specifically ask for them.

I chose not to add any colouring or scents to the latest batch of play dough.  Instead, I started the activity by introducing foam ropes and tissue paper.  The children then got to rip the tissue paper into tiny pieces and cut the foam rope – this was more challenging than I anticipated.  The foam was so dense that none of the children’s knives could cut through it.  Scissors worked but the cut pieces tended to fly everywhere – amusing to some of the children but annoying to anyone (me) trying to collect all the pieces.


The children then had the opportunity to mix the foam and paper into their dough – three very different textures.

15-10-LD02 

Some chose to add their ‘decorations’ one at a time while others did so by the handful.  Some used tools and played with their play dough as usual during the decorating process.


Interestingly several of them mixed the paper and foam pieces in the dough and then meticulously picked them all out and then mixed them in again.  In fact, we have played with this dough several times since we first made it and ‘undecorating’ it has been a very popular activity – fantastic for fine motor skills.

 15-10-LD04 

By far my favourite response to this activity came from the school-age children.  When they arrived after school and went to wash their hands for snack they saw the post-activity play dough on the counter.  They were super excited about having ‘cookies’ for snack – followed by a little disappointment that it was just play dough.


15-10-LD05

Friday, October 9, 2015

Squash

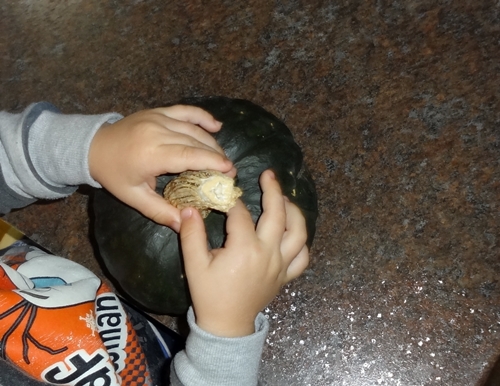
I love how many different types of squash we get in our CSA share from Wild Earth Farms.

15-10-squash01 

Each fall we collect some of the seeds from each of the different types of squash and try to grow our own plants in the spring.  We can usually manage to get them to sprout and sometimes even move them to the outdoor garden but beyond that we haven’t been very successful.


The squash we get from the farm is very interesting. There are so many different sizes, shapes and colours.  The textures of the stem, skin and innards are all so fascinating.

15-10-squash02 

We compare the weight of the various sizes;

 15-10-squash03 

And of course we taste them too.  All the muffin, cake and loaf recipes made with squash are very popular.  The savory items are more challenging.  Still, we try.  They may never become permanent menu items but it is always fun to see what we can do with all our squash.

 
15-10-squash04

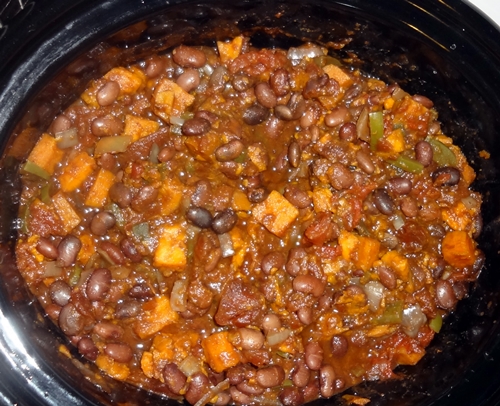
Slow-Cooker Vegetarian Chili

• 1 medium red onion, chopped
• 1 green bell pepper, chopped
• 4 garlic cloves, chopped
• 1 tablespoon chili powder
• 1 tablespoon ground cumin
• 2 teaspoons unsweetened cocoa powder
• 1/4 teaspoon ground cinnamon
• salt and pepper
• 1 28-ounce can diced tomatoes
• 1 15.5-ounce can black beans, rinsed
• 1 15.5-ounce can kidney beans, rinsed
• 1 medium squash, peeled and cut into 1⁄2-inch pieces
• sour cream, sliced scallions, sliced radishes, and tortilla chips, for serving

In a 4- to 6-quart slow cooker, combine the onion, bell pepper, garlic, chili powder, cumin, cocoa, cinnamon, 1 teaspoon salt, and ¼ teaspoon black pepper. Add the tomatoes (and their liquid), beans, squash, and 1 cup water. Cover and cook until the squash is tender and the chili has thickened, on low for 7 to 8 hours or on high for 4 to 5 hours. Serve the chili with the sour cream, scallions, radishes, and tortilla chips.

Thursday, November 20, 2014

Squash

This year we got a lot of squash in our CSA box from Wild Earth Farms.  We got a lot last year too but this year there was more. Luckily squash keeps longer than the other types of fresh produce so I didn’t have to use it all at once.  Some of it made a nice addition to our Fall decor.

14-11-squash01

I like that we got so many different kinds of squash and some I had never tried before.  I find it interesting that as I search for new recipes it doesn’t seem to matter what type of squash I use in the search I still get many similar recipes.  The only exception is the spaghetti squash which has some unique recipes that would not work as well if you used another type of squash.

I have roasted the various squash and used them in stir fries and stews.  I love squash however, it has been a challenge to get the children to eat it.  If it is not baked in a pie, loaf, or cake they will usually just leave it on their plate.

This week I tried something different.  I cut up an acorn squash, coated it with egg and a mixture of bread crumbs, flour, cornmeal, and taco seasoning.  Then I baked it until it got crispy – about 30 minutes at 425 F.  I served it along with our Mexican Chicken and Rice.

I loved it.  The baby inspected it very closely then dropped it off the side of the highchair without ever even tasting it.  The 2 year old children expertly gnawed all the breading off every squash nugget but left the innards. The three year old never even touched the squash.

After eating every last bit of her chicken and rice she pushed her plate away and announced that she was done.  The rest of our conversation went like this;

  • Me: You didn’t try your squash.
  • 3 yo: I don’t like it.
  • Me: How do you know that if you haven’t even tasted it.  It’s like a chicken nugget.
  • 3 yo: It’s not a chicken nugget.
  • Me: Try a little one.
  • 3 yo: No, I don’t like them.
  • Me: Why do you think you won’t like them?
  • 3 yo: McDonald’s doesn’t have squash nuggets.

Sigh.  No they don’t.

14-11-squash02

Monday, October 14, 2013

Feasting

Here in Canada today is Thanksgiving Day.  Soon my husband, my children and I will be heading over to my Mom’s for our family dinner.

I’m making a Thai Red Curry Kabocha Squash as my ‘non-traditional’ contribution to the holiday dinner.  My mom asked me to make something using one of the unusual items that I received in my CSA box.  I had never heard of kabocha squash until it arrived in the box last week.  As for the recipe…we’ll have to see how well it goes over later today.

In the meantime I’ll share a couple recipes that have recently been added to our childcare menu.
The first is an afternoon snack item that has proven to be very popular with the little ones.

Quinoa Pudding

DSC01898

2 cups quinoa, cooked
3 cups milk
½ cup brown sugar
3 eggs, beaten
1 tsp vanilla
½ tsp cinnamon
1 Tbsp butter
½ cup shredded coconut
½ cups raisins

Combine all ingredients. Pour into greased baking dish. Bake in 350-degree oven until set, about 45 minutes. Serve hot or cold

Admittedly I don’t like the texture of the quinoa – it doesn’t get as soft and mushy as rice pudding but that didn’t seem to bother the children.  It was surprisingly sweet given there is only ½ cup of sugar.

DSC01899

The second recipe was from the lunch menu and may be one of my all-time favourites – probably because it contains many of my preferred ingredients.

Spinach Strata

DSC01912

6 cups whole grain bread cubes
4 cups fresh spinach, chopped
1 cup diced bacon, cooked
1 cup cheddar cheese, grated
6 eggs
2 cups milk
¼ cup fresh basil
In a greased 8 cup (2 L) casserole; layer half the bread cubes, half the spinach, half the bacon and half the cheese, sprinkling each layer with salt and pepper.  Repeat layers, ending with cheese.

In a small bowl; beat eggs with milk and basil.  Pour egg mixture over the bread, spinach and cheese layers.  Cover and refrigerate at least 2 hours or overnight.
Bake, uncovered, in preheated 350 F (180 C) for one hour or until puffed and set in centre.

Sorry, I didn’t take a picture of the finished dish – only the partially assembled ingredients.  Mmmm, I’m getting really hungry just looking at them but that’s probably because I skipped lunch to save room for Thanksgiving dinner.

Happy feasting!

Thursday, July 25, 2013

Oriental Casserole

I haven’t done a major overhaul of the lunch menu for quite a while but there have been a few minor changes.  One of the more recent additions – about four months ago – was the Oriental Casserole.

This recipe was originally added because I needed a new rice recipe – I try to have a mixture of rice, pasta, potato and bread/sandwich lunches on the menu each week.  Now, I’d also have to say that, when they were young, my own children would have refused to eat Oriental Casserole or any other rice dish.  Now that they are all adults there is still only one that actually likes rice.

However, many of the children in my care today actually do like rice and for some reason they all LOVE the Oriental Casserole.   Even the really picky eaters eat it.  There was a lot of excitement at lunch yesterday because it was Oriental Casserole day.  I listened to the comments made throughout the meal and I think I know what ingredient in particular makes this dish so poular.

This is a short excerpt from the lunch conversation;
  • “You’ve never had this before? Oh, you’ve got to try it!  It has bamboo in it.”
  • “I didn’t know you could eat bamboo.  Now I know why panda bears like bamboo.”
  • “I think Cheryl should be on ‘Chopped’”.
  • “I can’t wait to tell my dad that we had wood for lunch.” (giggle)
  • “I wonder where you can buy bamboo?”
  • “I think they sell bamboo at IKEA.”
Just for the record, I don’t think opening a can of bamboo qualifies for participation on ‘Chopped’.  Here’s the rest of the somewhat vague recipe I use to make my Oriental Casserole.

Heat olive oil in pan and stirfry 4 stalks of celery (sliced), 2 onions (chopped), and any other veggies like peppers that I have on hand and feel like tossing in.   Add one or two cans of sliced bamboo shoots (drained), one can of water chestnuts. and a pound of cooked, ground pork.  Heat through.

Cook 2 cups of Basmati rice in 4 cups of water/chicken stock with several Tbsp of soya sauce.  Combine cooked rice with stirfried veggies and pork.  Serve immediately or put in a casserole dish to reheat in oven later.

I think it is really a pretty simple recipe but the children really enjoy it.

Tuesday, December 18, 2012

Mixed Reviews

We’ve been trying out some new recipes.  The first one I want to mention is my personal favourite of the three.  I originally made Veggie Pies for a potluck dinner but there was one whole pie leftover so I decided to reheat it for lunch the following day.

It did not replace the regular lunch but I used it as a side dish instead of salad or raw veggies and dip.  The children were unimpressed.  Few of them even tried it, choosing instead to just stare at it and shake their heads.  Fine then, more for me.  I wasn’t really surprised – cooked veggies are never popular.

MR01

Veggie Pie
  • 2 onions, chopped
  • 2 celery stalks, chopped
  • 1 red pepper, seeded and chopped
  • Olive oil
  • 4 large carrots thinly sliced
  • 2 cups Broccoli florets
  • 2 Tbsp chicken bouillon
  • ½ cup flour
  • 2 cups water
  • Pie crusts
 Sauté onions, celery and red pepper with olive oil in a large pot until softened.  Add carrots and broccoli and continue cooking for about five minutes stirring often. Blend in flour.  Mix water and bouillon and pour over veggies in pot.  Cook, stir often, until mixture thickens.  Pour into pie crusts in a deep pie plate.  Cover with top crust and seal the edges.  Make a few small slits in top for steam to escape.  Bake in 375 degree oven for 40 minutes until crust is brown.


The second recipe was also first introduced to the children because I had made far more than I needed for supper the evening before and rather than make more food for lunch I used the leftovers.  The reaction truly shocked me this time – every one of the five preschoolers finished all of their first helping and asked for more.

I added it to the lunch menu and the next time it was offered none of the children ate it.  I had inadvertently placed the wrong attachment in the food processor and sliced the carrots instead of grating them.  Carrot slices were easily recognized as cooked veggies and therefore rejected.  The third time I remembered to grate the carrots and most – but not all — of the children ate it again.
I couldn’t find the picture of the finished recipe – maybe I forgot to take one.  This picture is cropped from a larger picture where the food was not the main topic but it will have to do for now;

MR02

Quinoa Pilaf
  •  1 cup quinoa
  • 2 cups water
  • ½ tsp salt
  • Olive oil
  • 3 ribs celery, chopped
  • 2 onions, chopped
  • 4 carrots, grated
  • 1 tsp minced garlic
  • ½ cup raisins
  • 1 tsp thyme
  • 1 tsp oregano
  • Salt & pepper to taste
 Combine quinoa, cold water and salt in a saucepan, bring to a boil, reduce heat and simmer until liquid in fully absorbed.  Heat olive oil in large pot, add the celery, onions, and grated carrots; cook and stir until softened.  Add garlic, raisins, spices and quinoa, cook and stir until evenly mixed and heated through.

I also have this picture of one of the babies trying to eat every last piece of quinoa off the plate.  The spoon was too slow – he shovelled handfuls from the plate to his mouth.

MR03


The third recipe is one that I can barely force myself to eat but my husband and youngest son love it.  It has been offered twice as a daycare lunch.  Some of the children refuse it.  Most of the children eat it but none of them are really excited about it.  I doubt I’ll leave it on the menu.

It looked better before it was cooked;

MR04

Afterwards – not so much;

MR05

Chinese Stew
  • Olive oil
  • 3 onions, chopped
  • 1 lb pork, cubed or sliced

  • 4 cups frozen stir fry vegetables
  • 5 potatoes, cubed
  • 2 cups chicken broth

  • 398 ml can of crushed pineapple with juice
  • ¼ cup soy sauce
  • 4 Tbsp cornstarch
  • 2 tsp sugar
  • 1 tsp crushed garlic
Heat oil in large pot, add pork and onions.  Stir fry until pork browns and onions are soft.  Add vegetables, potatoes and broth.  Stir.  Bring to a boil then reduce heat and simmer until vegetables are tender.  Combine pineapple, soy sauce, cornstarch, sugar and garlic.  Add to pork mixture.  Heat and stir until sauce is boiling and thickened.

Those are just a few of the recipes we’ve been trying out recently.  Lunch is part of the adventure.