Showing posts with label Learning Environment. Show all posts

Wednesday, September 13, 2023

Summer 2023

 Wow! So much to write, so little time. Sad that I haven’t been writing any posts about our activities or any of our new ‘stuff’. Yes, the grant funding we’ve received through the Federal funding for childcare has been wonderful but also very time consuming. Spending money is easy but trying to balance ‘wants’ vs ‘needs’ and make the best decisions so I won’t be faced with ‘I wish we had bought that instead’ after all the money is spent – that is hard.

In the Spring when the grant funding was first announced I was already in the midst of making my summer ‘vacation’ plans for revamping the outdoor play space so those plans got a little more upscaled. I knew we had to remove the old rotted wooden pergola but we used that pergola to attach the sun shades for the summer. My south facing outdoor play space can be unbearable without shade – so my first purchase was two retractable awnings.

The old sunshades provided wonderful shade over most of the back yard but it took a whole weekend to get them up using clamps and ropes attached to the house, carport, and pergola. Once they were up, we had no view of the sky until fall when we took them down. On many cloudy or cool days we would have preferred to not have the sunshades but it was far too difficult to take them down temporarily.

This is a view of the yard after all the work we did on my ‘vacation’. You can see the framework for the new awnings but the awnings are not in use as this pic was taken in the early morning when there was little sun. I still struggle with deciding if I should say the awnings are ‘open’ when they are folded and we can see the sky and closed when they are unfolded and covering the yard or vice versa. Either way, all summer we loved to have the option of having sun or shade depending on the weather when we were playing in the yard.
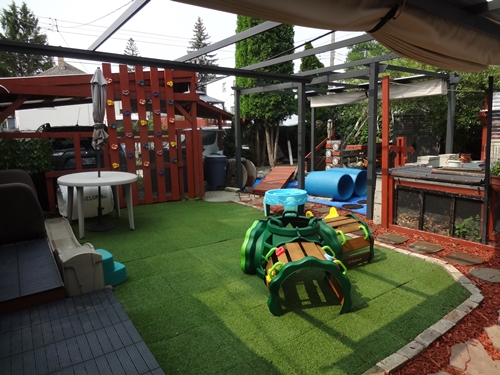
Outdoor Play Space

I also purchased more turf tiles – we used to only have a small ‘grass’ area inside the old pergola but now it is twice the size and more open without the pergola dividing the space. We also have a new ground level deck area along the fence side that we use for the easels and other art activities (the deck tiles are easy to clean and have no spaces big enough to lose crayons and paint brushes etc.
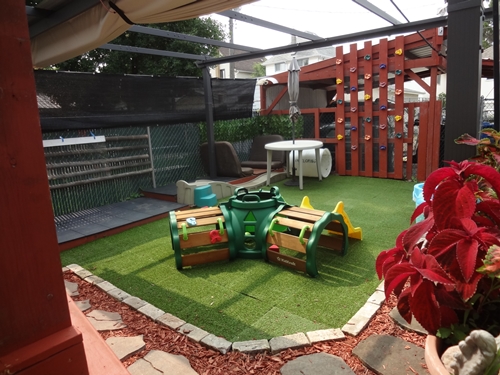
Outdoor Play Space

The turf tiles are thick rubber and placed on the mulch – both help cushion minor falls which is nice for the climbing structures and the new Ninja Slackline pictured below (also notice the awning is providing shade in this pic).
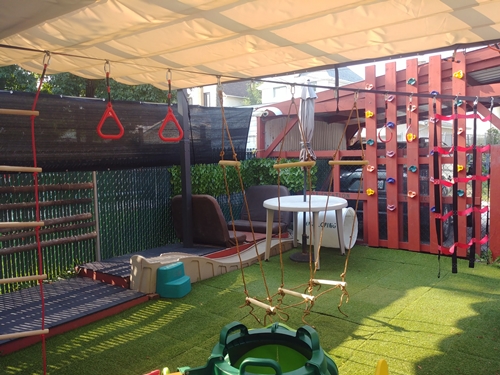
Play Space with Ninja Slackline

This summer we finally installed the large laundry sink (on the to do list last year). It is not a new sink, just a new location, and we have always had access to both hot and cold water here but now it is much more convenient to use.
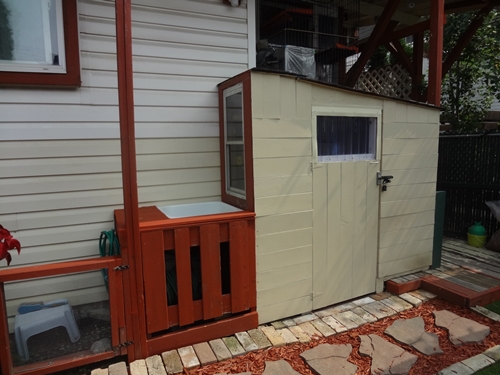
Wooden Storage Shed and counter with sink and hoses.

Moving along to the other side of the yard, we have a new, slightly sloped bridge across the ‘river’ in the water area and two new blue tunnels. The children like to pretend they are swimming under water when they crawl through these tunnels – I want to paint some fish inside the tunnels but haven’t done that yet.
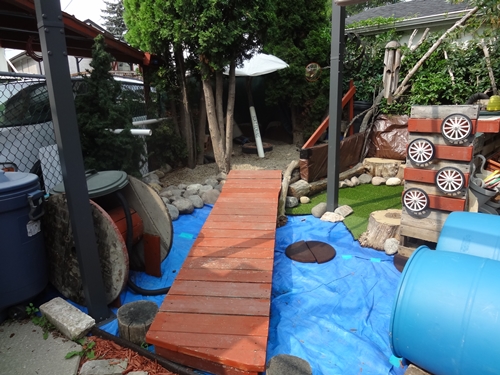
Wooden bridge over blue tarp river.

The bilge pump and water supply has a new location now too though I actually have plans to modify this area more before next summer so this is only temporary. The water from the pump flows under the bridge and down the ‘river’. The sprinkler hangs from the awning frame above the water area so we can make it ‘rain’ when we want the water area really wet (there are holes in the tarps so water does not pool).
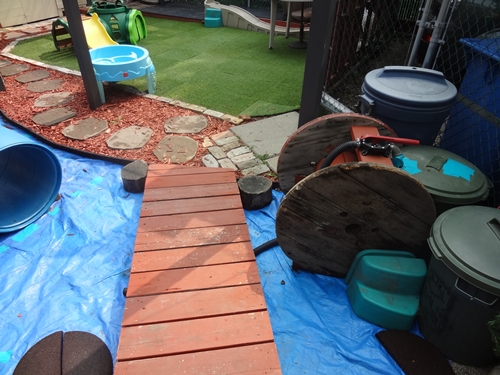
water barrel and pump with hose.

At the far end of the bridge is the gravel digging area – we needed the bridge higher here because the gravel area is more than a foot higher than the ground at this point. Plus, having a sloped bridge is extra fun ðŸ™‚ I chose to move all the gravel into the little covered ‘house’ we built last summer. The ‘house’ is in the corner of the yard which helps to keep the gravel contained in the area where it belongs and the roof above provides shade at all times of the day – particularly nice because some children like to sit and dig in the gravel for hours every day and I don’t want them to bake in the sun.
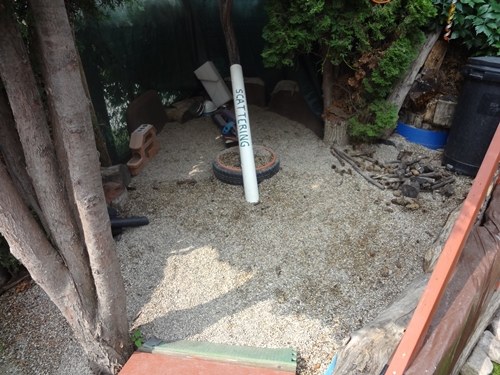
Enclosed gravel area with pots, pails, shovels, and sticks for digging.

The picture below is the view from inside the gravel area.
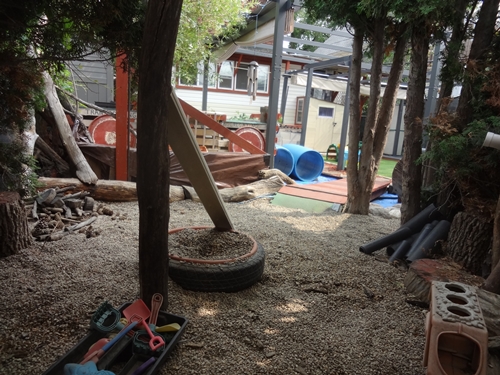
View through the trees towards the bridge and play area beyond.

I moved the talking tube (central vac pipe) from the building area where it used to be. Now it runs along the fence from the gravel area to the water area. I also added some elbows to the pipe so the children don’t look straight through the pipe when they are talking. Not that I minded them using it like a telescope, but some of them couldn’t grasp the concept of ‘talking’ into the tube when they could see through it and would get very frustrated that it didn’t work.
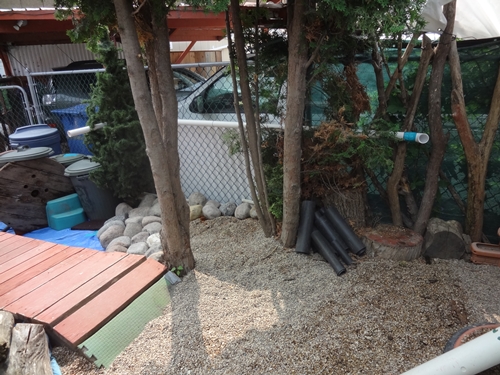
Ten foot long white pipe attached to chain link fence.

In the space where the gravel used to be is our new ‘music’ area. It is still not complete. In this picture there is nothing ‘new’, we have had the chimes, drums, and other noisy things for many years but now they are all together in a defined space. There are more turf tiles and our old stumps here for seating options. There are multiple different surfaces and items that can be used for experimenting with sound. Since this photo was taken I have purchased some Boomwackers and am collecting some additional ‘music’ making items to add in the future. (Donations are welcome if you have anything that may be useful here).
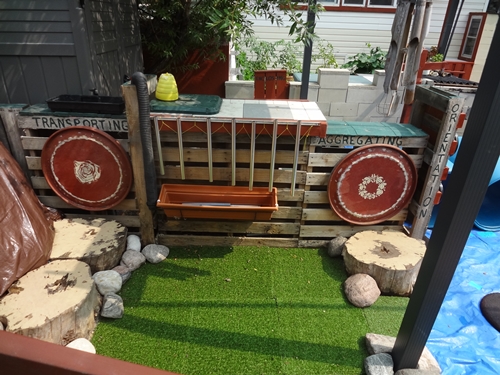
Outdoor area with chimes and drums.

View of the entrance to the music area – the Virginia Creeper has grown a lot and now covers most of the back and left side of the area – naturally containing the sounds in an acoustic chamber.

The building/construction area of the yard has not been moved or rearranged but I did purchase a large resin storage shed to store the massive amount of loose parts we have accumulated. We have far too much to have all of it out at once and our little toy shed only holds small bins and could not possibly contain all our building supplies.
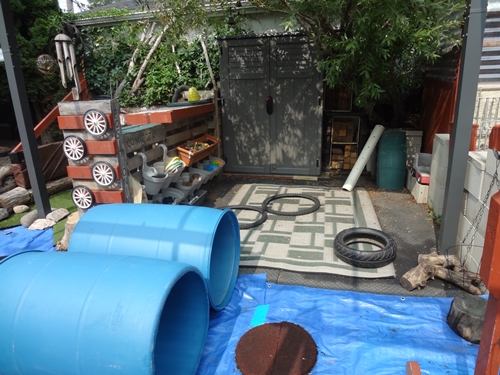
Outdoor Play area with Loose Parts for constructive activities.

A tiny peek inside the shed – this is less than a quarter of what is being stored here. Kept out of the elements but still handy when we want additional options beyond what is available in the loose parts bins.
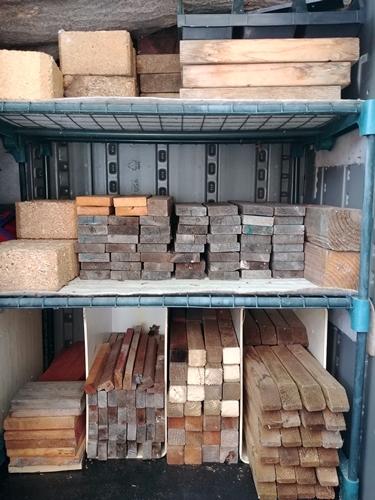
Various types of stacked wood pieces.

Tuesday, February 21, 2023

Cushions

 In my ‘Snowball Effect‘ post I covered a bit of history about the four old lounger cushions and mentioned that I wanted to use them for an infant/toddler activity. That ‘plan’ didn’t turn out the way I envisioned – partly because I don’t like sewing – but it has had an interesting outcome.

In the Spring/Summer/Fall we spend most of our playtime outside where there are plenty of opportunities for gross motor activities. In the winter, we still go out daily but for much less time than in the warmer seasons. Although I’m sure getting on all the winter gear counts a physical activity, I still feel the children need more active play choices for the extra time we spend indoors.

In my Indoor Exercise post and the post about the balance pods I wrote about some of the indoor physical activities which the preschoolers and school-age children enjoy. However, my current group is very young and those activities are not particularly age appropriate or easy to adapt for them.

My initial plan was to use the old lounger cushions for an indoor gross motor play activity for the littlest ones in the group. The cushions are about two feet wide, six feet long and six inches thick though they have some buttons and quilting and have become lumpy and uneven over the many years we have used them.

I wanted to fold and roll the cushions into barrel, wedge, and rectangle shapes to use for soft climbers for the infants and toddlers. I hoped to sew covers to hold the cushions in the desired shapes – turns out I haven’t got the required time, patience or skill for sewing covers like that. I might have been more successful if I had wrapped them with duct tape instead – that is still and option.

I also found that when folded into squares or rolled into short barrels the cushions were nearly as tall as the counters and shelves in the playroom – not a safe climbing height. Folded in half as a 2′ x 3′ rectangle the height was ok but they used all the available floor space and would have turned the entire room into a bouncy house – could be fun, but not my goal.

My ‘I am frustrated/out of time/done with this’ solution was to simply stack two of the cushions on top of each other, roll into a long barrel, and stuff into a body pillow type pillowcase I made out of an old sheet. The result is two long, heavy, lumpy blobs that lay like speed humps across the playroom. My husband refers to them as ‘The Manatee’.

The problem now was that these, double sized, heavy log cushions were extremely difficult for me to hoist onto the shelf in the nap room where they were originally stored. This whole ‘renovate the playroom/move the trees’ adventure started because I needed to make it easier to get the cushions on/off the storage shelves when I wanted to use them.

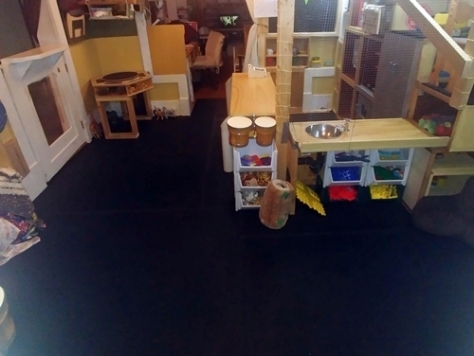
At this point I was beginning to feel like this whole project was a fail. Then I realized that leaving these cushions out all the time might solve two problems. First, I wouldn’t have to face the hassle of dragging them in and out of storage. Second, they could help with the problem of defining the various play zones. This is the view of the floor space in the play room.

The block area is at the bottom right corner of this picture. The music & movement area along the left side and the housekeeping/store/dramatic play area is the top right corner and extends to include the left side of the counter and the table.

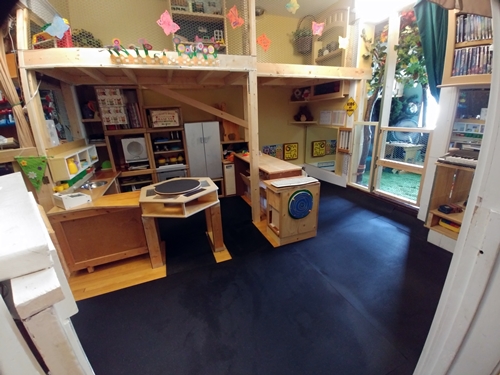
I used to use interlocking foam tiles on the playroom floor – available in various colours, I used a different colour mat for each of the different play zones. Those foam mats were easily damaged and Montgomery liked to eat them. So in 2021 I replaced them with rubber mats made from recycled tires – I love the durability, but they are all black so we only have imaginary lines to define spaces.

I’ve been experimenting with chalk and paint on some of the rubber tile scraps. I thought chalk would be nice for a temporary purpose/activity but it has proved difficult to wash completely off the mats. Paint seems to be a better option but would be permanent and, well…I like to be able to change things so I’ve been hesitant to paint the mats. But…what if I used cushion logs to define spaces…

child walking on coloured squares

I like to define the spaces because loose blocks from the block area or miscellaneous small toys from the housekeeping area are safety hazards when they are on the floor in the music & movement area. The cushions still offer the babies a soft climber opportunity but they also separate the ‘active’ area from the toy areas. Added bonus – they can be used for seating and even impromptu naps.

two children sitting on large cushion

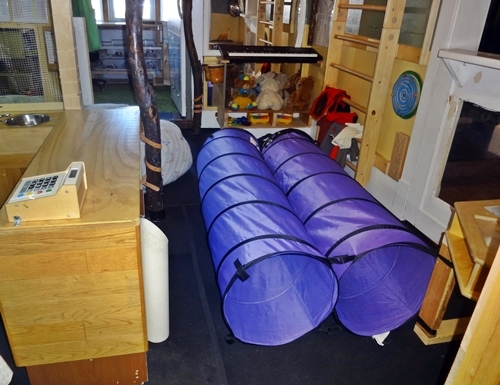
Using the cushion logs as dividers allows me to adjust the size of each of the play areas. There isn’t much space in the music & movement area in the picture above – certainly not enough space for the tunnels or the tumbling mats when the rope ladder or monkey bars are in use on the stall bars. The cushions can easily be moved out of the way for that though.

two tunnels in playroom

Moving both the log cushions into the block area doesn’t leave much space for building – it would annoy the school-age children. However, the infants and toddlers love this – and it encourages them to sit down in the block area too! Also great for story time.

Children sitting on cushion building with blocks.

I may have been a little disappointed that the soft climber didn’t turn out the way I originally planned but I am actually much happier with the versatility of the log cushions (or manatee).

Monday, February 20, 2023

Moving Trees

 In my previous post I wrote about how my plan to repurpose the old lounger cushions resulted in playroom renovation in order to move the ‘nature area trees’. I have been working on a post about the cushions and just realized that I never made a post about the trees after I finally got them moved. So now I’ve got a quick tree post to write – well, mostly just tree pictures to post.


playroom, facing West
Here is the renovated playroom with the trees – one on the far right by the entrance to the nap area and one in the centre of the play room.

Play room facing North
Facing North towards the entrance to the nap area the trees are both in the centre of the picture.

Play room facing South
Standing in the nap area, facing South toward the dining/craft room – one tree trunk out of frame to my left.

Playroom facing South East.
Standing in the block area looking toward the playroom entrance – shows the arch the trees form in the high part of the room.

Playroom looking up to the loft.
Standing in the music/movement area looking up at the tree ‘canopy’ filling the space in front of the loft. The children like to look for/count all the birds, squirrel and butterflies hidden in amongst the branches.

Now that I’ve shown you the trees, I can finish the post about the cushions.

Friday, November 18, 2022

The Snowball Effect

 First, a bit of history…

I have four large outdoor lounger cushions. I bought them many years ago at an end-of-season clearance sale – the discounted price meant I got all four of them for less than the cost of just one toddler cot so I couldn’t resist. I briefly used them for napping children – they are thicker, wider and longer than other nap mats. They are very comfortable but also very heavy and cumbersome to set up and put away for daily naptime and take up a lot of space so I ended up getting more cots for naps indoors.

The fabric on the lounger cushions is intended for outdoor use so that is where we used them most – for napping or relaxing in tents or on the deck etc. When not in use they were stored in bags in the big shed. During the Vacation 2019 renovation, ‘Frankenshed’ was disassembled and the new toy storage shed was too small to store the large cushions so they were brought back inside and again stored with the other cots and bedding.

The small room off the main playroom is used for napping infants and storage of cots, bedding, books, and bulky items I don’t want to haul down to the basement storage area. This area is still sometimes referred to as the ‘Nature Area’ because I left the trees in there from when this used to be a play area – written about in the Nature Area and the Quiet Space posts.

Now, this is when the snowball began to form…

I recently wanted to use the big cushions for a toddler activity, but found it was very inconvenient to get them off the shelves behind the tree branches. I decided that on the upcoming long weekend I should move the trees into the main playroom. Afterall, though it did look nice having the tree branches forming a canopy over the cribs, it would be wonderful if the trees were in the playroom where everyone could enjoy them.

So, I started looking for the best place to mount the trees in the playroom…and decided that I would first need to move the toy food counter…which then meant I would need to change the block storage area. *sigh* The list of necessary changes continued to grow and after thirty plus hours of demo, rearranging, building and organizing the playroom has been mostly ‘prepped’ for the arrival of the trees but, even with a three-day weekend, there wasn’t enough time to actually move the trees.

I am pleased with the new arrangement – so far – and the children seemed to like it too. All of the children in the current group have only ever seen the trees as decorations in the nap area – never as part of the play space. They are familiar with having other things in the play environment change but probably don’t realize these trees can be relocated. I am certain they will be excited when I manage to complete the project – and with the cushion activity too whenever I get around to that.

There are still a few more little tasks to complete before the trees get moved but hopefully that will be done this weekend. The snowball forming now it the growing list of paperwork that I should be doing ðŸ™‚

Wednesday, September 28, 2022

Summer Recap

 Every year, I take my summer vacation at the beginning of July so I can complete some big projects to prepare for all our summer activities. I don’t like to travel so going places is never on my vacation agenda. Relaxing is something I find difficult – maybe even stressful – I like to be busy. There are some types of ‘busy’ that I enjoy more than others and my summer projects are high up on my list.

Spring 2022 was so late, so wet, so…. depressing that it was really hard to get excited about summer projects. In fact, it was mid-June already when my husband asked, “What are your summer projects this year?” and I realized that I hadn’t even started making my list. Of course, there were things I wanted to do but nothing that I considered a BIG summer project – just a bunch of little things that I would normally plan as weekend projects.

The most obvious project to put on the summer list was the climbing wall – which I had purchased the supplies for last fall and planned to build as soon as the snow melted and have ready for when the school-age children were here for Spring Break – but it was still ‘winter’ when school was out for spring bbreak. The climbing wall was probably the most noticeable vacation project and very popular with the children all summer.

child on climbing wall

The second most noticeable project was the roof over the corner house – and I don’t even have a picture of it. Creating the corner house to replace the tipi was one of my 2021 vacation projects that I didn’t have time to complete the way I initially envisioned. I had simply made a temporary lean-to type of roof last year. This year I designed and built a better roof and moved all the bus benches into the corner house. It was a very popular sit spot all summer – I can’t fathom why I didn’t manage to get a picture of it. *sigh*

I also didn’t any pictures of the new layout of stumps, logs, and steppingstones in the mulch area or the enlarged ‘river’ area. I spent three whole days rearranging the pathways to align with the bridges and entrances to the building and digging areas. It was a very labour intensive project but not something particularly noticeable if you hadn’t spent a lot of time in the yard.

The children and I found the new pathways to be much more functional – as did this little visitor to my yard – caught on my surveillance camera, he/she followed the new curvy path perfectly all the way from the back gate to the side yard. LOL

skunk walking through yard

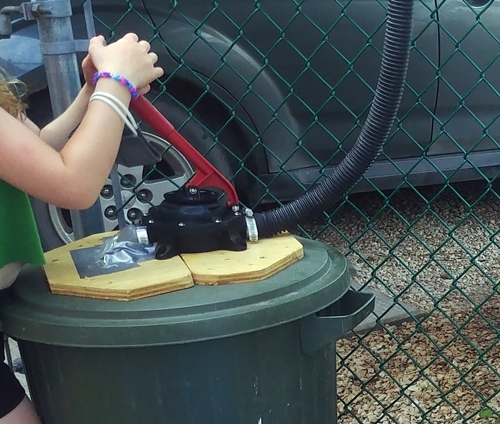
I expanded the ‘river’ area to make space for a new dedicated area for water play. I added a hand pump so the children could get water for creating concoctions. There was a delay in getting this area ready for use. The hand pump I originally chose did not function properly and was eventually replaced with this bilge pump.

child using bilge pump

The trick here though is that getting water requires some communication as the pump is not near the spouts…

children playing with water
Child collecting water

This area is still a work in progress – we hope to add more pipes, hoses and storage for other concoction making supplies. Of course, we are still collecting supplies too! It was a very popular play area this summer.

I also added a new painting panel. We’ve had several built-in plexiglass panels in the past and I have found that they get damaged in the winter. The framework I built for hanging this one is permanent but the panel itself is removable, so the space is still multipurpose, and the panel can be safely stored when not in use.

Children painting

I love plexiglass for painting on – even better when you can access both sides – and with the garden as a backdrop the artwork is enhanced.

Children's artwork

Well, that didn’t seem like a lot of dramatic changes to our learning environment. Certainly not any major transformations. Still, there were enough little projects to keep me busy on my ‘vacation’ and some new spaces for the children to explore this summer. In my next post I will highlight a few of our summer activities.

Tuesday, July 20, 2021

Vacation 2021

I didn’t take vacation time in 2020 so this year I was really looking forward to the time off to complete some much needed projects. I had a total of 19 days this year and five projects planned. Only one of the projects was an indoor project – replace foam tiles on playroom floor. It had originally been on my list for 2020 but then – no vacation, no reno.

I have replaced the interlocking foam tiles many, many times as a weekend project because removing old worn tiles and installing new ones isn’t very difficult. However, this time it was going to take longer as I was NOT planning on adding more foam tiles because Montgomery eats them and I don’t need more vet bills.

This time I went with much more durable rubber gym flooring. Like the foam, it provides traction and sound dampening over the hardwood floor and is so much nicer for sitting or crawling on.

My second project was not a play space but it improved access. The front sidewalk was just off centre of the front yard – two fence panels on the West side of the walkway and one fence panel on the East. There were stepping stones from the sidewalk to the front steps and side gate both located on the East side of the yard.

Now all three fence panels are together and the sidewalk is located on the East side of the yard and leads directly to the front steps and back yard gate. Bonus result is I could also expand the native prairie garden into the space where the sidewalk had been. The opportunity to add garden space means this project was more ‘relaxing’ than actual work even though the temps were about 30C every day! Oh, and we also added a garden bench because we had some extra wood! Only needed to buy a little soil and mulch, otherwise everything for this project was recycled/reused so total cost under $100 

The remaining three mini projects were all part of the full back yard renovation. The main purpose of which was to define the spaces better and improve storage for all the loose parts.

The picture below is from 2019 and shows the deep gravel ‘digging’ area on the right surrounded by stumps and the lower ‘building’ area on the left. I tried to keep the gravel in the building area level and packed – better for building on – but the children tended to dig here too, after all it was gravel.

The full back yard now looks like this (reverse viewpoint from above photo);

The logs, stumps, table, stepping stones, composter and main garden have not changed this year. The benches have been removed from the swing area, a new herb garden space was added and the mulch was replaced with turf tiles. Though part of the ‘master plan’ this project was actually completed on a weekend in the Spring prior to my vacation.

The first of the three backyard projects during my vacation was the loose parts storage wall between the gravel digging area and the new, larger building area with recycled rubber surfacing (and a carpet in case it gets too hot to sit on – though it is fully shaded). I kept the water area adjacent to the building area because the children LOVE building bridges.

There is so much more space for storing loose parts/building supplies and it is easier to access than the previous deep bins. I used pallets for the wall so more recycled wood!

Bigger items are still stored in some of the bins.

The other side of the pallet wall has new storage for the digging area which never used to have any loose parts or storage, just a few pails, pots and digging tools. Now there are so many more options.

Backyard project two was to replace the tipi – I know, everyone loved the tipi but its shape and placement were not very functional. I used the poles and covering to form a roof over the entire corner of the yard. It makes a larger ‘house’ and the tunnel was moved here too.

This is the view of the yard from inside the house;

The third backyard project is the new messy play area. Located inside the garden wall it is separate from the other areas. Made from reclaimed wood, tile samples, and a salvaged laundry sink, the total cost for this project was $0. We have not used it yet (only been one day), I don’t think any of the children even noticed it as they were so excited to explore all the other new spaces. Besides, I’m still collecting some containers of ‘ingredients’ for the children to use here but…soon…