Showing posts with label renovation. Show all posts

Friday, November 18, 2022

The Snowball Effect

 First, a bit of history…

I have four large outdoor lounger cushions. I bought them many years ago at an end-of-season clearance sale – the discounted price meant I got all four of them for less than the cost of just one toddler cot so I couldn’t resist. I briefly used them for napping children – they are thicker, wider and longer than other nap mats. They are very comfortable but also very heavy and cumbersome to set up and put away for daily naptime and take up a lot of space so I ended up getting more cots for naps indoors.

The fabric on the lounger cushions is intended for outdoor use so that is where we used them most – for napping or relaxing in tents or on the deck etc. When not in use they were stored in bags in the big shed. During the Vacation 2019 renovation, ‘Frankenshed’ was disassembled and the new toy storage shed was too small to store the large cushions so they were brought back inside and again stored with the other cots and bedding.

The small room off the main playroom is used for napping infants and storage of cots, bedding, books, and bulky items I don’t want to haul down to the basement storage area. This area is still sometimes referred to as the ‘Nature Area’ because I left the trees in there from when this used to be a play area – written about in the Nature Area and the Quiet Space posts.

Now, this is when the snowball began to form…

I recently wanted to use the big cushions for a toddler activity, but found it was very inconvenient to get them off the shelves behind the tree branches. I decided that on the upcoming long weekend I should move the trees into the main playroom. Afterall, though it did look nice having the tree branches forming a canopy over the cribs, it would be wonderful if the trees were in the playroom where everyone could enjoy them.

So, I started looking for the best place to mount the trees in the playroom…and decided that I would first need to move the toy food counter…which then meant I would need to change the block storage area. *sigh* The list of necessary changes continued to grow and after thirty plus hours of demo, rearranging, building and organizing the playroom has been mostly ‘prepped’ for the arrival of the trees but, even with a three-day weekend, there wasn’t enough time to actually move the trees.

I am pleased with the new arrangement – so far – and the children seemed to like it too. All of the children in the current group have only ever seen the trees as decorations in the nap area – never as part of the play space. They are familiar with having other things in the play environment change but probably don’t realize these trees can be relocated. I am certain they will be excited when I manage to complete the project – and with the cushion activity too whenever I get around to that.

There are still a few more little tasks to complete before the trees get moved but hopefully that will be done this weekend. The snowball forming now it the growing list of paperwork that I should be doing ðŸ™‚

Tuesday, July 20, 2021

Vacation 2021

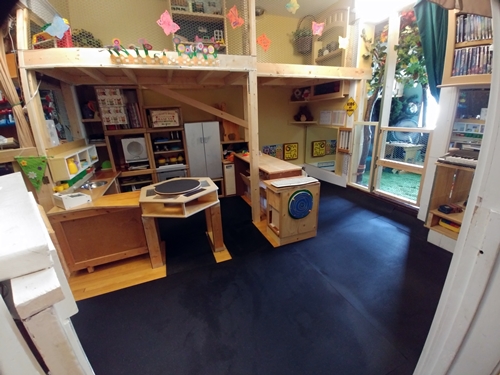
I didn’t take vacation time in 2020 so this year I was really looking forward to the time off to complete some much needed projects. I had a total of 19 days this year and five projects planned. Only one of the projects was an indoor project – replace foam tiles on playroom floor. It had originally been on my list for 2020 but then – no vacation, no reno.

I have replaced the interlocking foam tiles many, many times as a weekend project because removing old worn tiles and installing new ones isn’t very difficult. However, this time it was going to take longer as I was NOT planning on adding more foam tiles because Montgomery eats them and I don’t need more vet bills.

This time I went with much more durable rubber gym flooring. Like the foam, it provides traction and sound dampening over the hardwood floor and is so much nicer for sitting or crawling on.

My second project was not a play space but it improved access. The front sidewalk was just off centre of the front yard – two fence panels on the West side of the walkway and one fence panel on the East. There were stepping stones from the sidewalk to the front steps and side gate both located on the East side of the yard.

Now all three fence panels are together and the sidewalk is located on the East side of the yard and leads directly to the front steps and back yard gate. Bonus result is I could also expand the native prairie garden into the space where the sidewalk had been. The opportunity to add garden space means this project was more ‘relaxing’ than actual work even though the temps were about 30C every day! Oh, and we also added a garden bench because we had some extra wood! Only needed to buy a little soil and mulch, otherwise everything for this project was recycled/reused so total cost under $100 

The remaining three mini projects were all part of the full back yard renovation. The main purpose of which was to define the spaces better and improve storage for all the loose parts.

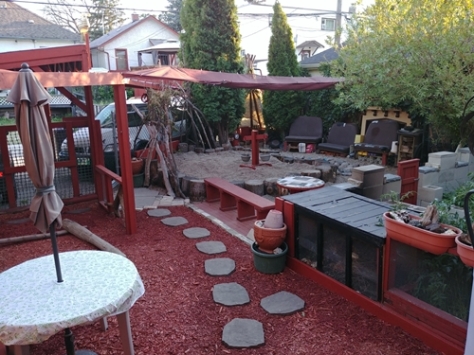
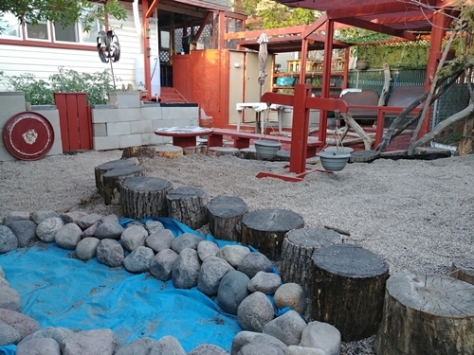
The picture below is from 2019 and shows the deep gravel ‘digging’ area on the right surrounded by stumps and the lower ‘building’ area on the left. I tried to keep the gravel in the building area level and packed – better for building on – but the children tended to dig here too, after all it was gravel.

The full back yard now looks like this (reverse viewpoint from above photo);

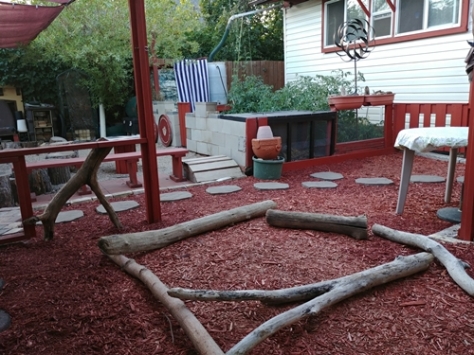
The logs, stumps, table, stepping stones, composter and main garden have not changed this year. The benches have been removed from the swing area, a new herb garden space was added and the mulch was replaced with turf tiles. Though part of the ‘master plan’ this project was actually completed on a weekend in the Spring prior to my vacation.

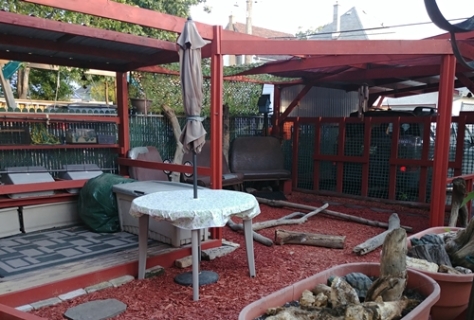
The first of the three backyard projects during my vacation was the loose parts storage wall between the gravel digging area and the new, larger building area with recycled rubber surfacing (and a carpet in case it gets too hot to sit on – though it is fully shaded). I kept the water area adjacent to the building area because the children LOVE building bridges.

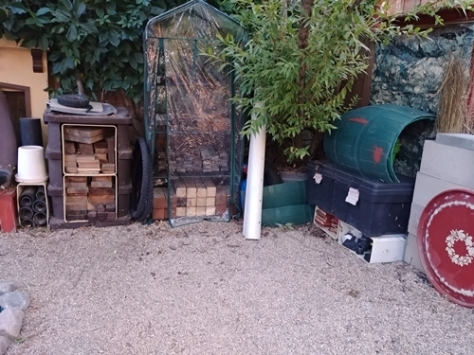
There is so much more space for storing loose parts/building supplies and it is easier to access than the previous deep bins. I used pallets for the wall so more recycled wood!

Bigger items are still stored in some of the bins.

The other side of the pallet wall has new storage for the digging area which never used to have any loose parts or storage, just a few pails, pots and digging tools. Now there are so many more options.

Backyard project two was to replace the tipi – I know, everyone loved the tipi but its shape and placement were not very functional. I used the poles and covering to form a roof over the entire corner of the yard. It makes a larger ‘house’ and the tunnel was moved here too.

This is the view of the yard from inside the house;

The third backyard project is the new messy play area. Located inside the garden wall it is separate from the other areas. Made from reclaimed wood, tile samples, and a salvaged laundry sink, the total cost for this project was $0. We have not used it yet (only been one day), I don’t think any of the children even noticed it as they were so excited to explore all the other new spaces. Besides, I’m still collecting some containers of ‘ingredients’ for the children to use here but…soon…


Monday, July 16, 2018

Vacation 2018

As usual I spent my two week ‘vacation’ working on projects and as usual I didn’t manage to complete ALL the things I had hoped to.  However, this year I DID spend my entire vacation outdoors because I was working on the backyard play space. It was wonderful!
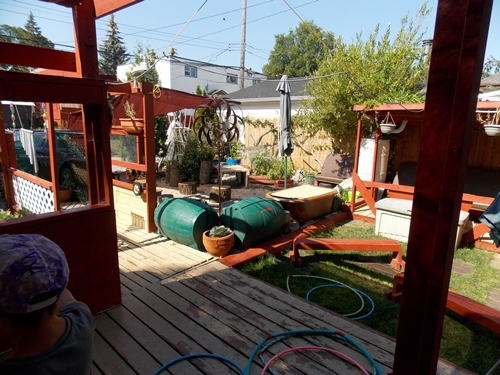
I’m back to work today and the children should be arriving soon so here’s a very quick post about the mostly completed yard.  First, the view to the SW corner as you leave the house;
18-07-yard01
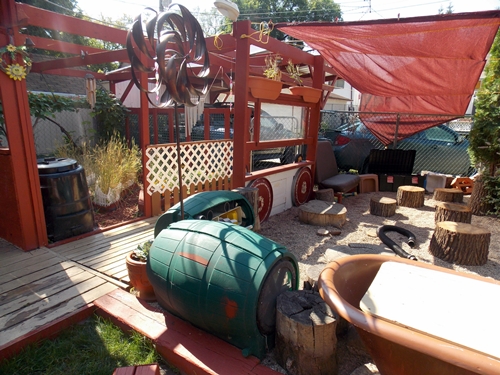
Down the stairs and looking to the SE corner;
18-07-yard02
From the SE corner looking to the NW corner;
18-07-yard03
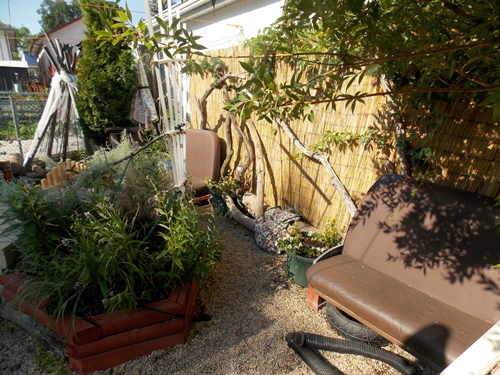
From the SW corner looking to the NE corner;
18-07-yard04
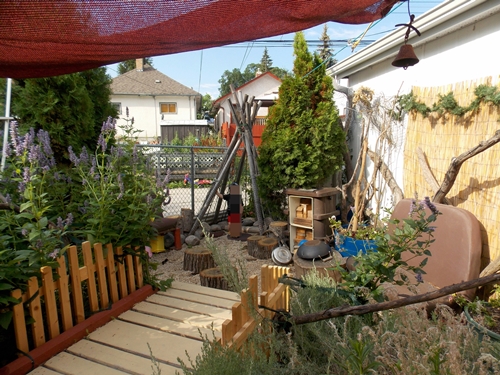
This is one of my favourite areas – my little hideaway under the cedars;
18-07-yard05
Here is the old tipi with newly added storage areas and camouflage cover;
18-07-yard06.jpg
I added ‘castle battlements’ to the wall between the gravel area and the garden and attached the drums here too. The table was made from a spool and some tile samples – supplies that were donated by parents;
18-07-yard07
The stump circle containing the ‘digging area’ was moved to one edge of the gravel area to make room for a ‘construction zone’.  All the building supplies are now stored conveniently under the willow;
18-07-yard08
The fence panel between the bark area and the car port is now the ‘art wall’ – although not quite complete yet – the planters will hold art supplies and paper etc can be clipped to the fence;
18-07-yard 09
I also have a large hammock that hangs in this area when we want to relax ðŸ™‚
The biggest part of this project is not visible –  the removal of the old deck and walkway – there were sections of it that were rotting and unsafe, it was 18 years old.  I couldn’t just trash the whole thing though, any sections of wood that were still good were of course salvaged and reused.
Total monetary cost of this entire project was $350 (mulch, stone, sunshade etc) and a few hundred hours of labour in 30 degree Celsius weather.  Perfect vacation.

Wednesday, August 3, 2016

Indoor Space

My list of summer renovation projects was two pages long – more than 3/4 of the items have already been completed:-) Revamping the outdoor space (see previous post) was the largest project.  Many of the indoor projects just involved sorting and reorganizing stuff but that takes time.

Of course there were some storage units that had to be re-built to fit in different locations but no ‘new’ pieces were necessary.  In fact, a horizontal storage unit became a vertical unit and the items in two other units were consolidated into one so we actually gained a fair amount of extra floor space – bonus!

Much of the work was done to areas that are off-limits to the children so they are completely unaware of the  changes but I am certainly pleased with the results.  When you’ve only got 1200 sq ft to work with and you want to make it usable for a dozen people every little bit helps.

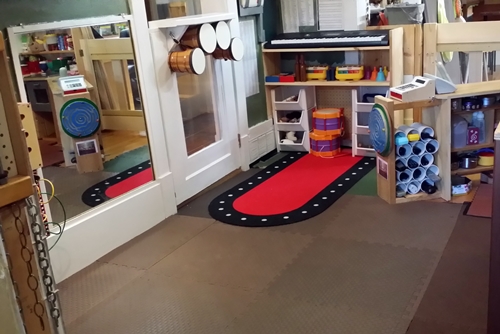
I felt there were several issues with the arrangement of the playroom and I definitely wanted to address at least some of them.  First, this was the old storage space for the workshop tools and musical instruments;

16-08-PR01

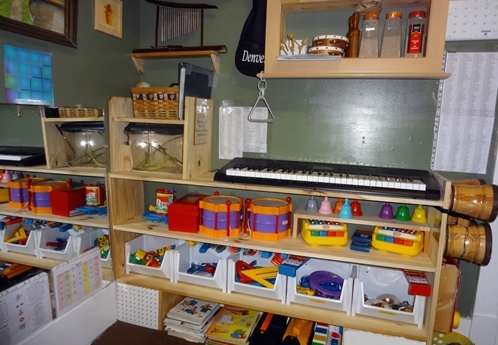
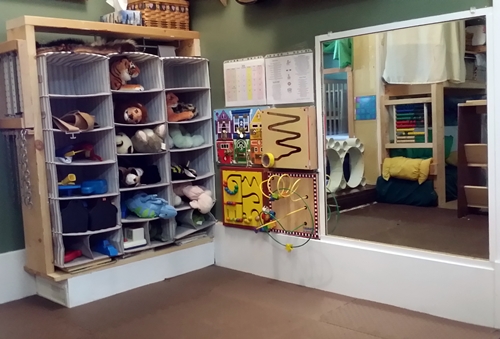
The problem I had here is that the floor space allocated for constructive play and music activities was just 6o square feet. When most of the toys are stored on one shelf unit on the longest wall the play space becomes a very narrow rectangle.  I wanted to make two smaller storage spaces – one at each end of the long, narrow space which would result in a more usable almost square play space. So, the above corner now looks like this;

16-08-PR02

Just the tools, puzzles and stuffed animals are stored here now.  The musical instruments are stored separately on the other end of the play space;

16-08-PR03

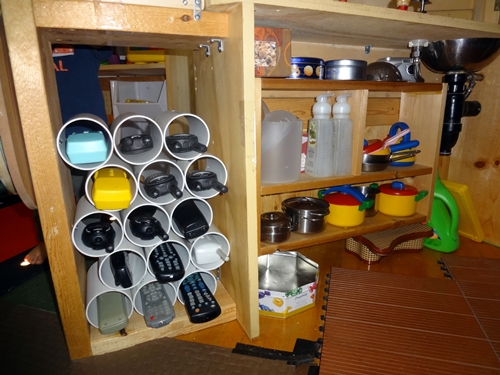
There used to be a basket of old phones, remotes, and walkie talkies in the space under the cash register.  The children often dumped everything out of the basket when looking for a specific item but no one liked to pick up all the leftovers.  Now the items are stored like this instead;

16-08-PR03a

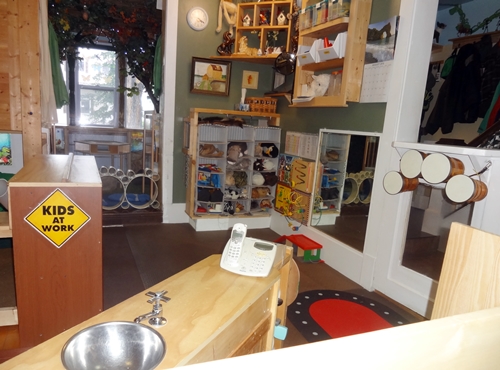
This is my new view of the playroom from my desk if I was ever inclined to sit down to do any paperwork;

16-08-PR04

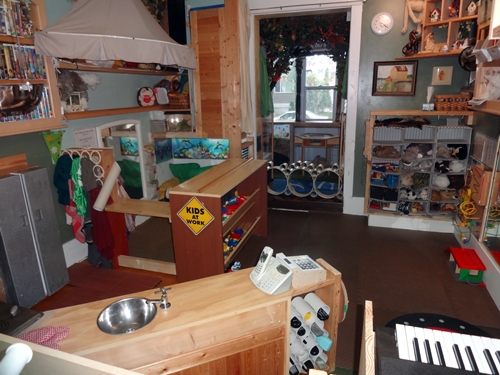
And this is as close as I can get to showing the entire playroom in one photo;

16-08-PR07

Housekeeping, dress-up, library and quiet corner on the left, entrance to nature area on far wall, blocks, tools and music on right side.

I’m not particularly fond of the way all the housekeeping toys are currently stored – some items are too high for the children to easily reach. I can’t complain if children climb when I’m the one who put things they are allowed to play with on a shelf that is too high.  Reorganizing that storage space is one of the not-yet-completed items on my list.  I am still not certain how to address all the issues there so until I’ve devised an acceptable plan it will have to stay as is.  Sigh.

Thursday, July 30, 2015

Vacation 2015


Well, I’ve been back at work for almost two weeks now and I haven’t managed to write a single post about my vacation projects or anything else either – bad blogger – busy summer.

I planned six – yes SIX – projects to complete during my vacation.  We got three done and one of them actually isn’t fully complete yet.  Today I am going to write about the biggest of my vacation projects – the front entrance.

Back in 2005 I wrote about the front entrance for my CBA portfolio.  I explained how I wanted the entrance to be a welcoming, comfortable and functional space.  Here’s the pdf version of that portfolio entry if you want to read the whole thing.  CCC-entrance

Looking back at it now I have to laugh at the line about it being painted a ‘bright mauve colour’ – that certainly wasn’t welcoming.  I would never purchase paint that colour – it was some old paint that was left here by the previous homeowners.  Even as ‘free’ paint it was putrid and the entrance didn’t stay that colour for long.

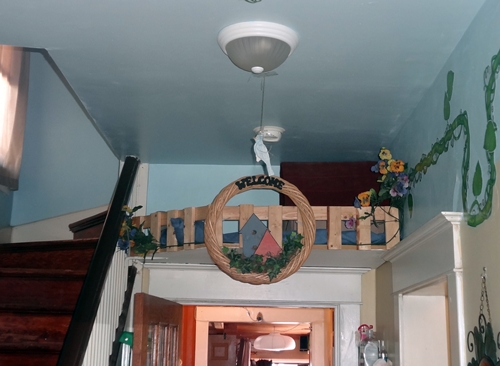
My newly renovated entrance is much more inviting.  We even added a ‘Welcome’ sign up on the cats’ loft because even Mali and Malta love to greet the children in the morning;

15-07-entrance01


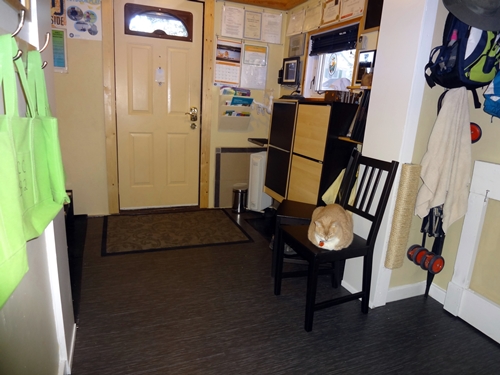
You’ll often find Mali waiting in the entrance for visitors to arrive.  Here she’s trying out one of the new chairs;

15-07-entrance02

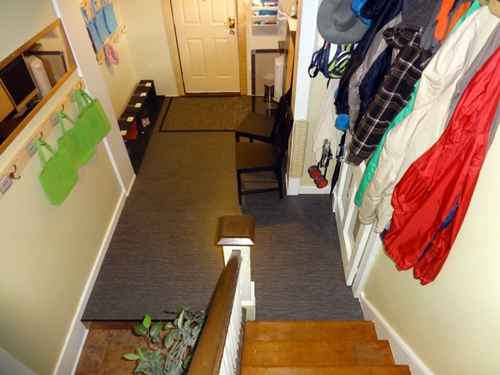
Only by going part way up the stairs can I get most of the entrance in a single photo;

15-07-entrance03

I put the toddlers’ name tags on their bench so they can sit on their ‘spot’ without having to turn around and see which hook is theirs.

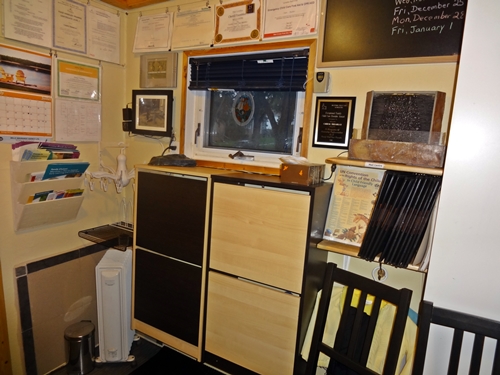
The East side of the entrance has some information for parents, storage for extra clothes, the digital picture frame with photos of the children ‘in action’, and the new addition – a relaxing fountain which the children love but I tend to turn off once everyone has arrived because the sound of constant running water becomes very irritating distracting.

15-07-entrance04

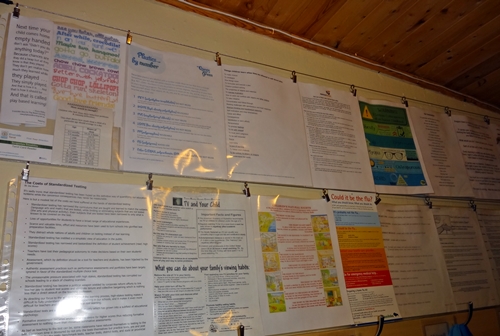
The old magnetic bulletin board on the West wall was also annoying because gusts of wind from the door would blow the magnets and papers off the board.  I now use wires and these handy hooks from Ikea;

15-07-entrance05

The parents are thrilled by the new entrance – the children prefer some of the other new spaces but that’s another post.

Monday, January 26, 2015

The Summer Yard

So, I was looking through my 'Blog pics' directory - the place where I store the pictures I plan to use in blog posts - and realized I had taken a lot of pictures of the yard space but had never written a post about last summer's yard renovation.  A mid-winter post about the summer yard might be just what we need :-)

It was back in 2013 that I first wrote about the plans  to move the fence that separates the gravel area and the parking area.  You can read more about those plans here.  We didn't have enough time that summer to complete that renovation so it was slated for summer 2014 instead.  This is a 'before' photo taken from above;

14renoHVbefore

And this is an overhead view of the yard after the fence was moved;

14renoHVafter

It is a little difficult to see but we lost a small triangle section of the gravel area on the left side of the picture but gained the same amount of space near the lane past the neighbour's garage - where the tipi is now.  This extra space allows us to see what is going on outside the yard which was nearly impossible when the fence ended at the corner of the garage and our van parked perpendicular to the lane.

Here's the view as you come down the steps from the house to the deck;

14-07-yard01

As I walk across the grass area and look left toward the garden;


14-07-yard02

and right toward the covered seating area;

14-07-yard04

Walk through the covered seating area and enter the gravel area looking towards the right side of the hill;

14-07-yard08

Then look through the gravel area to the left of the hill towards the corner of that used to be playspace alongside the carport;

14-07-yard06

Now in the gravel area looking back toward the house and deck - here you can see the old water barrels which have been re-purposed to store the loose parts;

14-07-yard07

Turn around and look toward the 'new' playspace past the hill where the tipi is now;

14-07-yard11

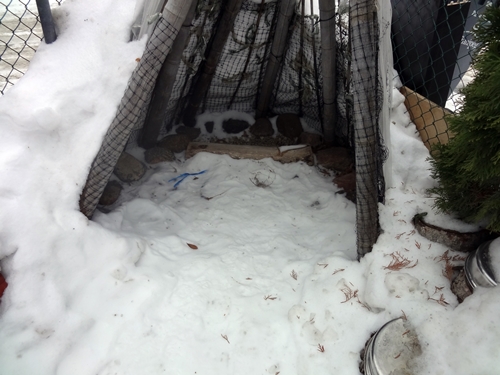
This is the most popular space.  Even in winter the tipi is the favourite sit spot - as snow is cleared from the parking area it is piled behind the tipi making it a cozy little spot;

15-01-tipi

We love our outdoor play space in every season.

Thursday, August 28, 2014

Nature Area Mini Scenes

The major portion of our most recent playroom renovation took place back in April – read about it here.

There were some smaller projects – both indoors and out – that I planned to work on as time permitted throughout the spring and summer. One of these was the mini-scenes in the nature area. They were originally built back in November of 2011 (wow, doesn’t seem like it was that long ago).

Last year I wrote a post about how the children were using – or rather NOT using – the mini scenes. That post is here.

The original mini scenes were created using scrap lumber and was attached directly to the wall. The decorations also were attached to or painted on the wall and shelves. This made it difficult for me to modify or repair them when necessary.

Last winter we decided we needed to put a heater in the nature area because it does get cold in there. In order to put the heater under the window we would have to move the shelves – perfect time to rebuild them.

This time I planned to build free standing shelf units that, although they are attached to the wall for stability, can be moved. The decorations are now attached to panels that fit in the shelves. This way we can change the mini scenes panels later without taking the whole unit apart.

The new scenes are slightly larger than the old ones and the heater separates the ‘indoor’ house section from the ‘outdoor’ scenes. It is impossible to get all of the nature area in one photo but this is an overhead view of the new nature area – it shows the shelves and the floor space but not any of the trees;

14-08-NS00

The ‘bridge over the river’ is also the stool the toddlers use to look out the window. My daughter sewed the felt logs and fire for me – I don’t like sewing but that is another post.

These are closer shots of the shelves – ‘The Forest’, ‘The Meadow/Garden’, and ‘The Beach';

14-08-NS04

‘The 2nd Forest’ (would be the jungle if I had other decorations), the ‘Winter’ scene, and the ‘Underwater’ scene;

14-08-NS05

The house scenes are still a work in progress. I started decorating but there is some more furniture I want to make and I want to add a bathroom too – bathrooms are the children’s favorite rooms;

14-08-NS06

I will be adding some windows and other decorations – winter projects. I considered cutting a whole in the back of the kitchen shelf because the ‘real’ window is directly behind this shelf so there could be a ‘real’ view from the dollhouse kitchen window. My husband muttered some comment about a ‘sickness’ that he thinks I have…I’ll just paint the kitchen window like I was planning to do in the other rooms.

The new scenes have been very popular. When we are inside there are always children playing here. There are many different toys the children can use here but they particularly like the dolls I recently purchased from Quality Classrooms;

14-08-NS07

It has been difficult to take pictures of the children playing here because it is a small space for the six or seven children that like to congregate here. I’ll keep trying. I’ll also post some more pictures when I have added more decorations and furniture. As usual it will never be ‘finished’ but it will continue to evolve like all our other spaces.