Showing posts with label Vacation. Show all posts

Sunday, January 7, 2024

Decluttered

 I don’t usually make New Year’s resolutions – but this year I did. 

It’s no secret that I like to plan big projects for any periods of downtime – like my summer ‘vacation’ days. I don’t like to travel, and I say I don’t like relaxing, but I’m not certain that is truly accurate. Things that involve being pampered or catered to are not things that I enjoy – in fact, they are more likely to make me feel uncomfortable and stressed. Likewise, sitting still for any length of time is difficult for me and requires an immense amount of mental effort.

I feel ‘relaxed’ – maybe centered, invigorated or rejuvenated are better descriptions – by doing things like going to the gym, hiking, doing yardwork, cleaning or working on projects around the house like painting or installing new flooring etc. Things that keep me moving but don’t require me to carry on conversations with other people – these things are ‘relaxing’ – they allow my mind to wander and dream without interruption.

My summer vacation to-do list starts forming late fall/early winter and continues to grow until June. Every year the summer project list also includes some indoor ‘organizing’ items in case there are any bad weather days on my vacation.  These tasks are always at the bottom of the list and usually get put off – mostly because I’d rather do the outdoor tasks regardless of the weather – but also because they tend to be more stationary ‘activities’.

This is where this post truly begins. Putting off these organizing tasks – especially the ones that involve paperwork and filing – over and over again had become an issue. My filing cabinet became too full to add any more papers to the folders so loose papers were just laying on top of the folders and were prone to falling off if the cabinet drawer was opened.

Due to having no available space in the filing cabinet there were multiple piles of ‘to-be-filed’ papers collecting on my desk. It was becoming almost impossible to find any workspace or even a flat spot to put my computer keyboard, mouse, or coffee cup. This, along with my already established distain for sitting still, definitely contributed to my delaying other paperwork type tasks. Related side story…

Montgomery had gone for his annual vet visit in October 2022 and received his rabies vaccination. I put the receipt and vaccination certificate, with new tag still attached, on my desk – I planned to file them after I put the new tag on Montgomery’s collar. Fast forward seven months to May 2023 – childcare relicensing visit. My coordinator asked for the required proof of pet vaccination and I KNOW it is on my desk but cannot find it*sigh* Had to contact the vet, get another copy, complete an inspection agreement form and submit it to my coordinator to prove he was fully vaccinated.

I think that, though I add organizing activities as small tasks for bad weather days, I know that they are really immense tasks. They may start as ‘Sort through the miscellaneous items in the drawer/box/bin’, but they snowball because sorting and organizing papers and small items requires, removing things from where they are stored and making piles of loose things.

Putting away those loose things requires getting out the storage container where the items belong – containers which should be sorted through before anything new gets added…making more piles of loose things. It takes a lot of time to do properly and it always gets much worse before it gets better. It is overwhelming.
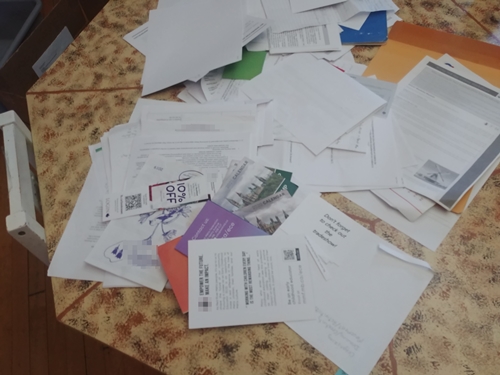
messy pile of papers on a table

I tend to use the childcare space for organizing things. It is the largest open space and it is unused when the daycare is closed. I can spread stuff out to sort and leave it there while I take a break or cook supper etc. and it isn’t going to bother my family. However, when I run out of time (which I most certainly will do), I frantically stuff unsorted items back into containers so I can clean the rooms before the children return.

I’ve now created even more containers of miscellaneous items that need to be sorted…

So this year I tried something different. The winter break consists of three paid holidays and two weekends but there are also three work days. Depending how the holidays land, the three work days could be centered between two long weekends or broken up into single days between holidays and weekends. 

Many of my families have extra time off during this period and do not all require childcare. Typically I have kept the daycare open for those three work days. I do some year end paperwork on the extra days off but don’t plan any big projects due to the variable combination of work days and off days. 

This year I closed for those three days resulting in a whopping ten day winter holiday! I reorganized some toy storage, cleaned out the filing cabinet, and cleared off my desk. Did I get everything done? No, of course not, my to-do list never ends – but I feel so much better. I found Montgomery’s original vaccination certificate and rabies tag. I created only one extra box of ‘to be shredded’ papers but no boxes of miscellaneous stuff.

So that New Year’s Resolution…I’m going to modify my policies to officially close those three work days between Christmas and New Year’s day every year. My summer vacation will still have an exciting list of fun projects – but no paperwork. My new annual winter holiday will now be dedicated to sorting and organizing because this is how the new year should start…
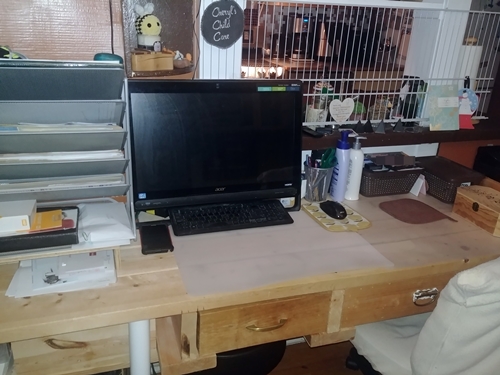
clean desk

Wednesday, September 28, 2022

Summer Recap

 Every year, I take my summer vacation at the beginning of July so I can complete some big projects to prepare for all our summer activities. I don’t like to travel so going places is never on my vacation agenda. Relaxing is something I find difficult – maybe even stressful – I like to be busy. There are some types of ‘busy’ that I enjoy more than others and my summer projects are high up on my list.

Spring 2022 was so late, so wet, so…. depressing that it was really hard to get excited about summer projects. In fact, it was mid-June already when my husband asked, “What are your summer projects this year?” and I realized that I hadn’t even started making my list. Of course, there were things I wanted to do but nothing that I considered a BIG summer project – just a bunch of little things that I would normally plan as weekend projects.

The most obvious project to put on the summer list was the climbing wall – which I had purchased the supplies for last fall and planned to build as soon as the snow melted and have ready for when the school-age children were here for Spring Break – but it was still ‘winter’ when school was out for spring bbreak. The climbing wall was probably the most noticeable vacation project and very popular with the children all summer.

child on climbing wall

The second most noticeable project was the roof over the corner house – and I don’t even have a picture of it. Creating the corner house to replace the tipi was one of my 2021 vacation projects that I didn’t have time to complete the way I initially envisioned. I had simply made a temporary lean-to type of roof last year. This year I designed and built a better roof and moved all the bus benches into the corner house. It was a very popular sit spot all summer – I can’t fathom why I didn’t manage to get a picture of it. *sigh*

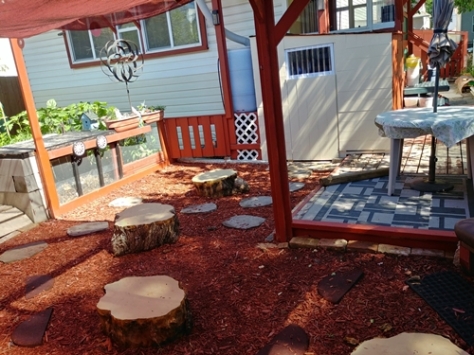
I also didn’t any pictures of the new layout of stumps, logs, and steppingstones in the mulch area or the enlarged ‘river’ area. I spent three whole days rearranging the pathways to align with the bridges and entrances to the building and digging areas. It was a very labour intensive project but not something particularly noticeable if you hadn’t spent a lot of time in the yard.

The children and I found the new pathways to be much more functional – as did this little visitor to my yard – caught on my surveillance camera, he/she followed the new curvy path perfectly all the way from the back gate to the side yard. LOL

skunk walking through yard

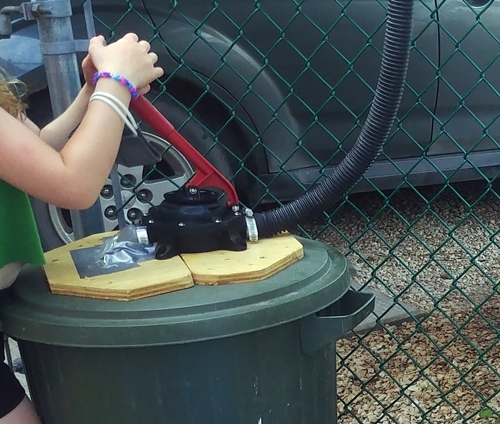
I expanded the ‘river’ area to make space for a new dedicated area for water play. I added a hand pump so the children could get water for creating concoctions. There was a delay in getting this area ready for use. The hand pump I originally chose did not function properly and was eventually replaced with this bilge pump.

child using bilge pump

The trick here though is that getting water requires some communication as the pump is not near the spouts…

children playing with water
Child collecting water

This area is still a work in progress – we hope to add more pipes, hoses and storage for other concoction making supplies. Of course, we are still collecting supplies too! It was a very popular play area this summer.

I also added a new painting panel. We’ve had several built-in plexiglass panels in the past and I have found that they get damaged in the winter. The framework I built for hanging this one is permanent but the panel itself is removable, so the space is still multipurpose, and the panel can be safely stored when not in use.

Children painting

I love plexiglass for painting on – even better when you can access both sides – and with the garden as a backdrop the artwork is enhanced.

Children's artwork

Well, that didn’t seem like a lot of dramatic changes to our learning environment. Certainly not any major transformations. Still, there were enough little projects to keep me busy on my ‘vacation’ and some new spaces for the children to explore this summer. In my next post I will highlight a few of our summer activities.

Saturday, August 3, 2019

Vacation 2019

Another two week vacation, another big outdoor project – perfect! But before I tell you what I did on my vacation I’ll give you a little yard history.

The upper deck existed before my childcare home opened. It separated the South facing backyard from the East facing side yard. The side yard was the dog’s yard and the vast space under the upper deck was her dog house. The play space in the back yard consisted of a 300 sq ft gravel area with a play structure and a 360 sq ft ground level deck. The outdoor toys were stored in a tarp wrapped wooden frame shed built against the West fence.

There was no back wall on that little toy shed because it was positioned against the fence. It was about 15 years ago that we moved the toy shed so we could use that spot for our first garden – it was the only spot in our back yard that was not deck or gravel. We then attached the toy shed to the South side of the upper deck where the open back allowed us to extend the toy storage to the space under the deck (after we made the dog house smaller).

The tool/garden shed was located by the carport – South of the lower deck and East of the gravel area. When we decided we needed a bigger garden space, we took the tool shed apart and rebuilt it ON the rarely used lower deck and attached it to the front of the toy shed. We then put in a bigger garden where the tool shed had been.

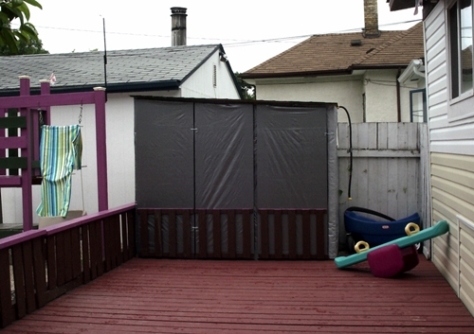
This picture was taken many years ago on the upper deck;


The shelf and framed white panel on the right side is the back and top of the old toy shed. The higher redwood wall beyond it is the back of the tool shed. Not visible in the picture – back door of the house behind me, stairs down to the back yard on the right, and stairs down to the side yard on the left. Also not shown is the bike shed which is in the side yard attached to the North side of the upper deck.

We had created ‘Frankenshed’ – it had a very large foot print but inefficient storage. You could enter the bike shed from the side yard, then crawl under the upper deck, go through the toy shed and then go out the tool shed into the back yard. However, it wasn’t a convenient path – more like a labyrinth where there was the possibility you could be lost for long periods of time. Sometimes when the children asked for toys that were stored I would tell them I’d see if I could find them on the weekend. I was never sure how long it might take me to find the toy and get back out of Frankenshed.

The only good way to get from the back yard to the side/front yard was by going over the upper deck. Even the lawn mower, snow blower, bikes and lumber had to be taken this way. It was frustrating at times. When the children and I were out in the back I couldn’t see the front gate because the upper deck and Frankenshed blocked my view. Consequently we rarely played outside later in the day when there was the chance parents may arrive.

So, on my vacation we;
  • built a new tool shed in the side yard
  • sorted all the stored items from all the sheds
  • took apart the garden shed, toy shed, potty house and bike shed
  • removed half of the upper deck and one staircase and moved the other staircase
  • built a new toy shed and a new garden shed/potty house
  • disassembled, repaired and reassembled the garden wall
  • created a new ground level walkway

We worked outside for 10-12 hours each day of my two week vacation. It was wonderful! Now I want to spend even more time outside in the yard. Some of the changes are actually quite subtle but almost every part of the yard has changed at least a little bit so I’ll include before and after pictures for each corner of the back yard.

NW yard in 2018
 
NW yard in 2019
 
The old potty house – by the water barrel in the back of the garden – was used only for potty training toddlers who couldn’t make it inside quick enough. Now that area is our new convenient toy storage shed.

SW yard in 2018
 
SW yard in 2019
 
Picture angle is slightly different due to the movement of the stairs so the entrance to the back yard is now six feet farther East. Many of the stumps, stepping stones and tables have been moved too.

SE yard in 2018
 
SE yard in 2019
 
Again, stepping stones, stumps and table moved. Added rope swings and removed sensory bins – the bins now have a spot in the gravel area with the toys instead of being in the active play area.

Construction area & kitchen
 
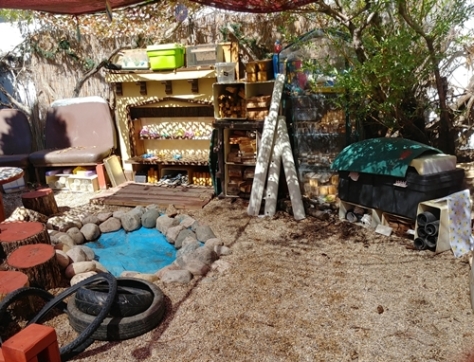
The pond was moved to make room for a larger loose parts/construction area. In the old fireplace mantle we added shelves for storage of dishes & pots which never had a dedicated space before. There is also a counter which can be used for ‘cooking’ but can also hold the sensory bins when we want to use them.

NE yard in 2018
 
NE yard in 2019
 
Here is where you see the biggest difference. The cinder block garden wall was originally built on the wooden cribbing for the gravel area. The wood was deteriorating and sections of the wall were tilting in different directions. The wooden cribbing was replaced with an additional row of cinder blocks. I doubled the size of the awning so we have twice as much shade. The ‘pond’, rocks, table, stumps etc were rearranged to create a larger construction area and make room for the sensory bin area (not visible in this picture).

The stairs and a portion of Frankenshed were visible in the 2018 photo but in the 2019 photo there is only the smaller garden shed/potty house. This new little shed was built entirely from wood salvaged from the old shed and deck. The potty shed half is large enough for diaper changing and also has running water.

This next picture shows my view from the bench by the carport – on the East side of the garden shed I can now see all the way through the side yard to the front gate! The ground level walkway (also built from recycled deck boards) has enough space for the art table which used to be on the upper deck and was not visible from the yard. There is a small gate beside the garden shed to prevent any of the littles from wandering into the side yard which is still not a play area.


That’s enough writing for now – I’m going outside to play…

Monday, July 16, 2018

Vacation 2018

As usual I spent my two week ‘vacation’ working on projects and as usual I didn’t manage to complete ALL the things I had hoped to.  However, this year I DID spend my entire vacation outdoors because I was working on the backyard play space. It was wonderful!
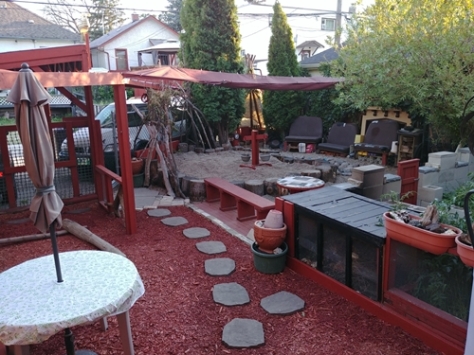
I’m back to work today and the children should be arriving soon so here’s a very quick post about the mostly completed yard.  First, the view to the SW corner as you leave the house;
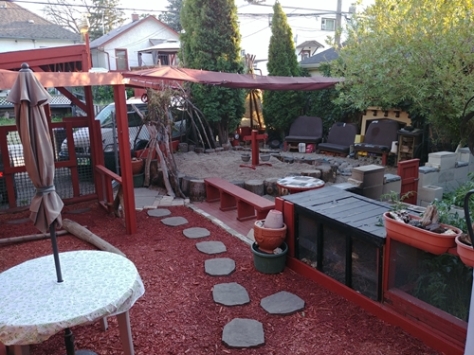
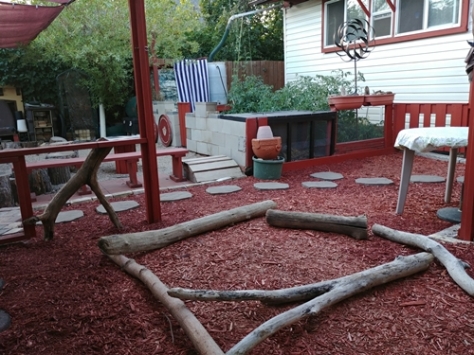
18-07-yard01
Down the stairs and looking to the SE corner;
18-07-yard02
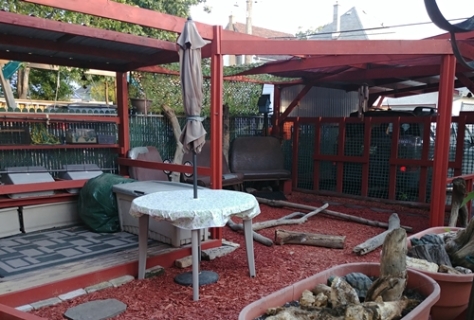
From the SE corner looking to the NW corner;
18-07-yard03
From the SW corner looking to the NE corner;
18-07-yard04
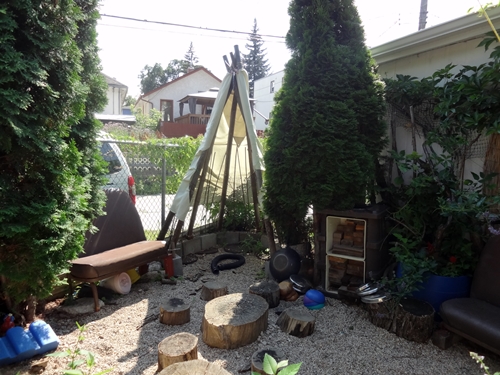
This is one of my favourite areas – my little hideaway under the cedars;
18-07-yard05
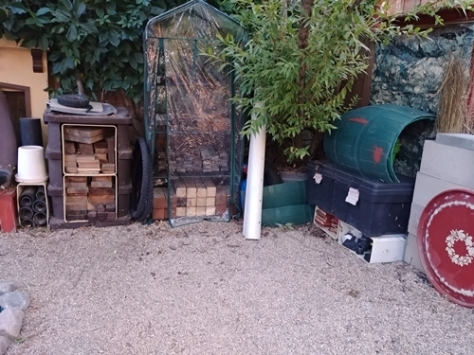
Here is the old tipi with newly added storage areas and camouflage cover;
18-07-yard06.jpg
I added ‘castle battlements’ to the wall between the gravel area and the garden and attached the drums here too. The table was made from a spool and some tile samples – supplies that were donated by parents;
18-07-yard07
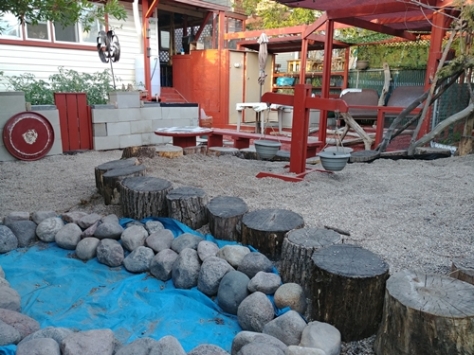
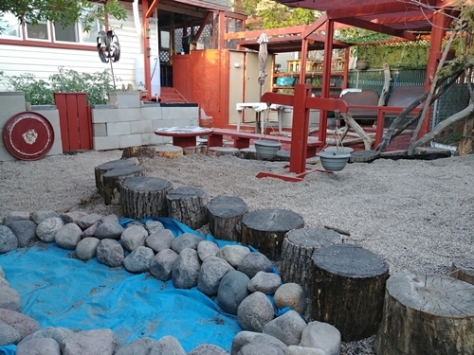
The stump circle containing the ‘digging area’ was moved to one edge of the gravel area to make room for a ‘construction zone’.  All the building supplies are now stored conveniently under the willow;
18-07-yard08
The fence panel between the bark area and the car port is now the ‘art wall’ – although not quite complete yet – the planters will hold art supplies and paper etc can be clipped to the fence;
18-07-yard 09
I also have a large hammock that hangs in this area when we want to relax ðŸ™‚
The biggest part of this project is not visible –  the removal of the old deck and walkway – there were sections of it that were rotting and unsafe, it was 18 years old.  I couldn’t just trash the whole thing though, any sections of wood that were still good were of course salvaged and reused.
Total monetary cost of this entire project was $350 (mulch, stone, sunshade etc) and a few hundred hours of labour in 30 degree Celsius weather.  Perfect vacation.

Friday, July 22, 2016

Reuse, Recycle

Warning - I think this might be a long post but I don't want to try to break it up into two or three smaller posts.  Persevere through the rambling history - it will be worth it, I promise...

Often my husband complains people comment that I am always building/making something but really I am always moving/changing something.  Inside and outside my childcare home I create the furnishings, equipment, lofts, storage units etc to fit a specific space or purpose to suit the interests/needs of the group of children enrolled at that time. Sometimes there are items in stores or catalogues that I like but the dimensions or features are wrong for my application so I draw a plan and make one that will work.

Sometimes I feel my projects may seem incomplete/unfinished - maybe I didn't have enough time to complete my vision due to inclement weather or other delays.  Possibly the project has several phases or there was something I forgot to take in to consideration when I made the plan.  I've taken down shelf units and discovered that the wall behind them was a color that is no longer on any other wall in the house and I have had neither the time nor any extra paint to fix it.  That's OK because for me everything is really just temporary - it may not be long before I devise another plan that will require another change and that wall will be covered again.  The original project may even be abandoned entirely in favor of a better idea.

When I remove something from the play space I rarely discard any of the pieces - there may be another use for them at another time.  Sometimes I've even secretly dug a piece or two of scraps from the cut off bin that I felt were too valuable to have been put there.  It drives me crazy to watch those home renovation shows when they take a sledge hammer to the place and destroy perfectly usable parts. Go ahead, label me a 'hoarder' but I can't count the number of times I've said something like "You know what I need here... wait...  I've got something in the basement/shed/bin that just might work".  Occasionally I even 'attach' items that are not really needed at the time but it is easier than finding a place to store the extra pieces.  It is better for the environment if I can reuse something.  Besides, I find shopping for new stuff is so time consuming, often stressful and definitely more expensive.

This spring/summer I have changed at least a portion of every part of our indoor and outdoor play spaces.  In fact, I just looked at the slideshow on my homepage and realized that NONE of the spaces pictured there exist anymore!  Yet, for all my recent projects and changes I estimate the total cost of supplies to be less than $300 - that is a small price tag for a fairly major renovation.  Of course, that doesn't cover what labour costs might be if I didn't consider renovating to be an exciting recreational activity - I'd rather be in the midst of a construction project than traveling or laying on a beach any day!  That comment now leads perfectly to the real topic of this post;

'What I Did on My Vacation - 2016 Edition'.

This year the bulk of the work was done to the outdoor play space - hooray, plenty of outdoor time!  There were several preliminary projects that were done earlier in the spring.  The biggest of those involved moving the garden - this couldn't wait until vacation time because our seedlings needed to be planted earlier than mid-July so the garden phase was started in May.  For a while the old and new garden spaces were only partially finished and had to wait for other project phases to be done.  The most noticeable change took place during the first week of July - the removal of what was left of the shed.

Here is a little shed history.  The original 8 x 10 backyard shed was built a long time ago - I'm not even certain of the exact year but I'm going to estimate that it was about 1999.  My husband designed it and the entire space belonged to him - the children and I used only the 12'x30' ground level deck, the gravel area and a small storage shed beside the upper deck.  In 2009 when I wanted to plant a garden we disassembled the entire shed and then reassembled it on top of the deck adjacent to my little shed.  This enabled me to use the ground space where my husband's shed had been in exchange for a portion of the deck that we rarely used.

That worked for several years until 2013 when we moved half the big shed to the side yard.  The side yard shed contained the tools and allowed my husband to work in his separate side yard space at the same time as the children and I were playing in the back yard. There wasn't room for the whole shed in the side yard so we left half of it on the back deck.  Last summer we put windows in remaining section of the backyard shed thinking maybe it would make a good playhouse type space.  However, it was only used maybe three or four times in the past year and I felt the open deck space would be more beneficial so down it came.  Of course I've safely stored the windows and all the other usable parts too.

Throughout all these shed projects the only time we purchased new wood was when we didn't have old pieces that were long enough.  Consequently there was a lot of nostalgia as the shed was disassembled.  I found grey boards from the original shed, green and purple boards from the old wooden play structure, white boards from the old fence, black pieces from the old wooden wagon and even a couple dark brown stained pieces that may have even been from the shed at our old house!
So, I bet you are wondering what the 'new' back yard looks like.  You're probably getting tired of just words so how about a bunch of pictures with just a few words.  Here is the view of the gravel area from the 'new' entrance;

16-07-RR03

And a closer view of the tipi corner;

16-07-RR03a

This is where the entrance to the gravel area used to be - I always had to trim the willow back so we could get by.  Now I can let it grow and it makes such a cozy seating area (you can hardly see the benches in the corner).  The cinder block 'chalk wall' was extended too;

16-07-RR04

Here's another view of that corner;

16-07-RR04a.JPG

This is the new little 'bridge' entrance to the gravel area;

16-07-RR04b

The entrance to the gravel area was moved to make way for the new garden space so all these projects were done in May.  This is what our new garden looked like in June - peas, beans, corn, peppers, tomatoes, wheat and flax;

16-07-RR05

And in July;


16-07-RR05a

From the other side;

16-07-RR05b

Here's the new seating/play area where the old garden had been.  The children call this the 'trampoline' because the thick layer of mulch is spongy to walk/run on.  Part of the old garden is still here - Milkweed and herbs.

16-07-RR06

Here is what you see if you sit on the benches and look toward the gravel area;

16-07-RR06a

This is Frank - a friend I made when we first began the shed demo.  I kept moving him to safer places so he didn't accidentally get squished.

16-07-RR01.JPG

So beautiful and friendly.  Kept distracting me.  Almost forgot to take the 'before demo' picture.  Here's an 'already started but still mostly there' picture;

16-07-RR02

The new open, freshly painted deck space after shed demo - all this space was under the shed in 2009 and half in 2013;

16-07-RR07a

Combination wooden bench/balance beam/toddler table/moveable space divider and also a fun little fold-up/down table (extra parts).  This is the same camera angle as the 'before demo' picture.

16-07-RR07b

View of new space from the gravel area;

16-07-RR06b

Wood, gravel, garden, mulch - texture everywhere :-)

Friday, July 4, 2014

Summer Holidays

So, today is the last day before my ‘holiday’ begins.  As usual I have a HUGE list of projects to complete this summer.  Some of them are smaller projects that will be done on weekends.

The ‘big’ project will involve rearranging the parking area, moving the fence,  and an overhaul of the gravel area and loose parts storage.  I wrote about the plans last Spring – read about it here.  We already built/moved the sheds but ran out of time last summer to complete the project.

I’ve had nearly a full week with my new summer group and it was wonderful.  Everyone is settling in to our routine and the lack of a school-defined schedule has greatly improved the ‘flow’ of the day.

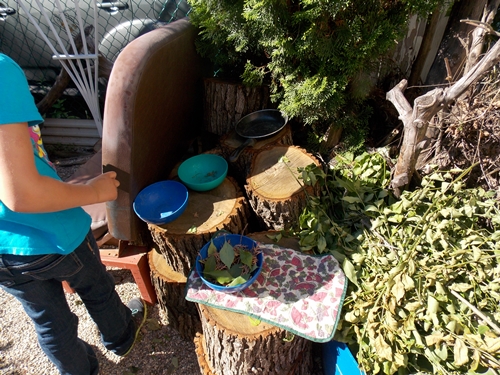
Outside I have all the new stumps stored in the corner of the yard waiting until the yard project begins.  Interestingly, the older children have deemed this to be the ‘perfect cooking spot’.  Hmmm, I’ll have to modify my plans a little so we can continue to accommodate this;

SH01

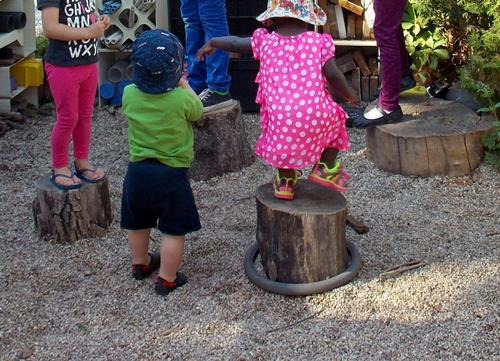
The old stumps are still as popular as ever.  The lone boy in the group seems somewhat concerned about all the climbing and jumping about.

SH02

Later he put on the construction helmet and did this;

SH03

‘No climbing here’ :-)

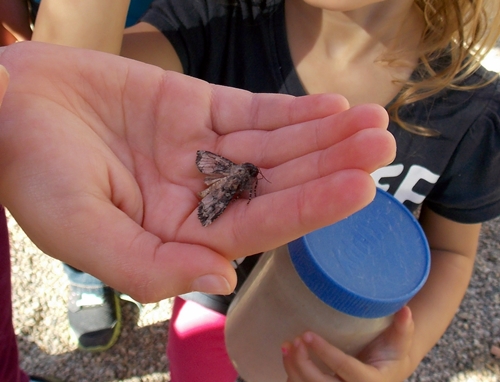
I found a dead moth and gave it to the insect lovers.

SH04

Turns out it wasn’t dead – just injured – so it was rushed to the emergency room. For nearly an hour a team of dedicated medical personnel worked to save the moth – or at least make it a little more comfortable.  Here is his x-ray/chart;

SH05

As excited a I am about all the renovations I have planned for the next two weeks I am also going to miss these kinds of activities too.  However, I’m certain we’ll have many more adventures when we return.