Showing posts with label Loose Parts. Show all posts

Wednesday, September 13, 2023

Summer 2023

 Wow! So much to write, so little time. Sad that I haven’t been writing any posts about our activities or any of our new ‘stuff’. Yes, the grant funding we’ve received through the Federal funding for childcare has been wonderful but also very time consuming. Spending money is easy but trying to balance ‘wants’ vs ‘needs’ and make the best decisions so I won’t be faced with ‘I wish we had bought that instead’ after all the money is spent – that is hard.

In the Spring when the grant funding was first announced I was already in the midst of making my summer ‘vacation’ plans for revamping the outdoor play space so those plans got a little more upscaled. I knew we had to remove the old rotted wooden pergola but we used that pergola to attach the sun shades for the summer. My south facing outdoor play space can be unbearable without shade – so my first purchase was two retractable awnings.

The old sunshades provided wonderful shade over most of the back yard but it took a whole weekend to get them up using clamps and ropes attached to the house, carport, and pergola. Once they were up, we had no view of the sky until fall when we took them down. On many cloudy or cool days we would have preferred to not have the sunshades but it was far too difficult to take them down temporarily.

This is a view of the yard after all the work we did on my ‘vacation’. You can see the framework for the new awnings but the awnings are not in use as this pic was taken in the early morning when there was little sun. I still struggle with deciding if I should say the awnings are ‘open’ when they are folded and we can see the sky and closed when they are unfolded and covering the yard or vice versa. Either way, all summer we loved to have the option of having sun or shade depending on the weather when we were playing in the yard.
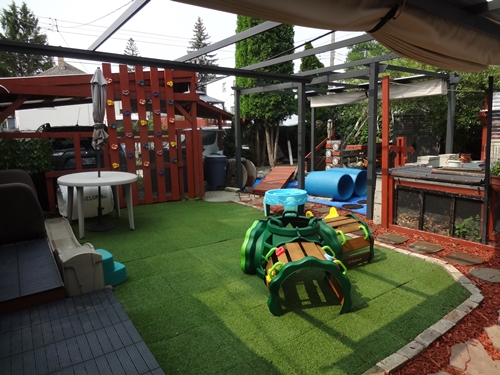
Outdoor Play Space

I also purchased more turf tiles – we used to only have a small ‘grass’ area inside the old pergola but now it is twice the size and more open without the pergola dividing the space. We also have a new ground level deck area along the fence side that we use for the easels and other art activities (the deck tiles are easy to clean and have no spaces big enough to lose crayons and paint brushes etc.
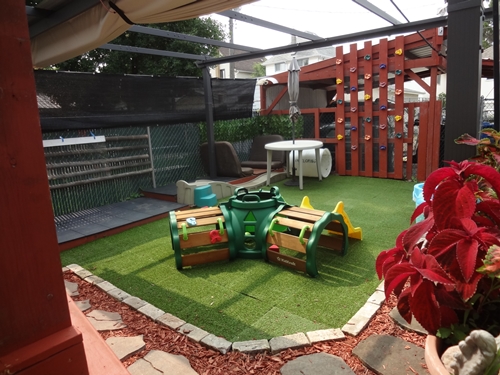
Outdoor Play Space

The turf tiles are thick rubber and placed on the mulch – both help cushion minor falls which is nice for the climbing structures and the new Ninja Slackline pictured below (also notice the awning is providing shade in this pic).
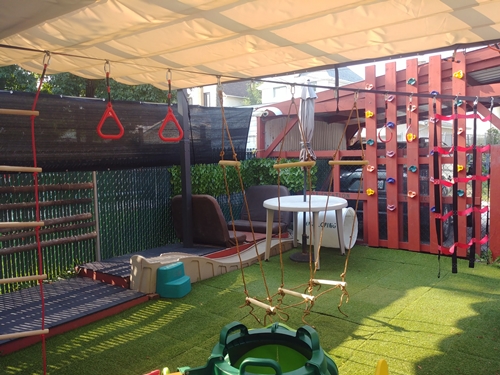
Play Space with Ninja Slackline

This summer we finally installed the large laundry sink (on the to do list last year). It is not a new sink, just a new location, and we have always had access to both hot and cold water here but now it is much more convenient to use.
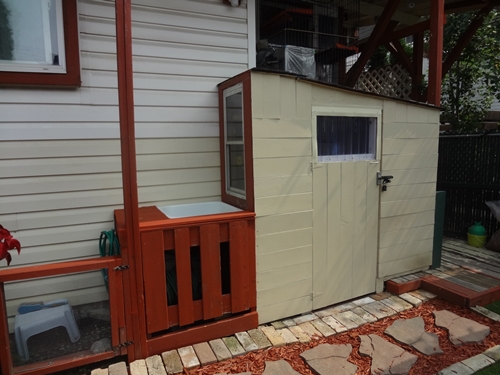
Wooden Storage Shed and counter with sink and hoses.

Moving along to the other side of the yard, we have a new, slightly sloped bridge across the ‘river’ in the water area and two new blue tunnels. The children like to pretend they are swimming under water when they crawl through these tunnels – I want to paint some fish inside the tunnels but haven’t done that yet.
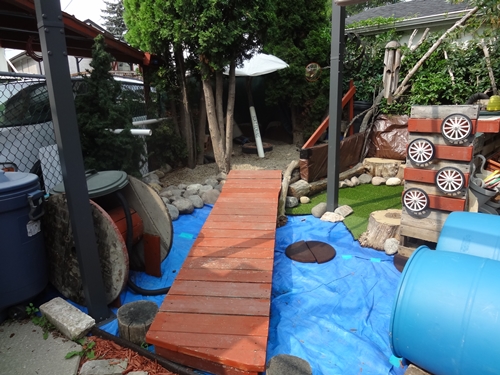
Wooden bridge over blue tarp river.

The bilge pump and water supply has a new location now too though I actually have plans to modify this area more before next summer so this is only temporary. The water from the pump flows under the bridge and down the ‘river’. The sprinkler hangs from the awning frame above the water area so we can make it ‘rain’ when we want the water area really wet (there are holes in the tarps so water does not pool).
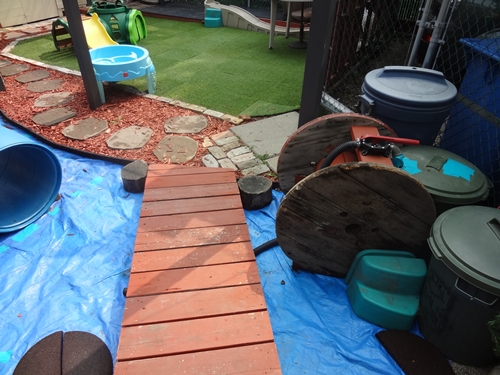
water barrel and pump with hose.

At the far end of the bridge is the gravel digging area – we needed the bridge higher here because the gravel area is more than a foot higher than the ground at this point. Plus, having a sloped bridge is extra fun ðŸ™‚ I chose to move all the gravel into the little covered ‘house’ we built last summer. The ‘house’ is in the corner of the yard which helps to keep the gravel contained in the area where it belongs and the roof above provides shade at all times of the day – particularly nice because some children like to sit and dig in the gravel for hours every day and I don’t want them to bake in the sun.
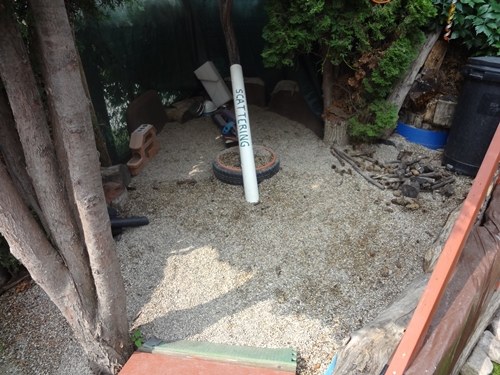
Enclosed gravel area with pots, pails, shovels, and sticks for digging.

The picture below is the view from inside the gravel area.
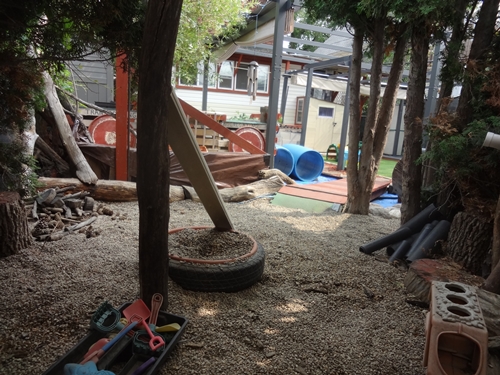
View through the trees towards the bridge and play area beyond.

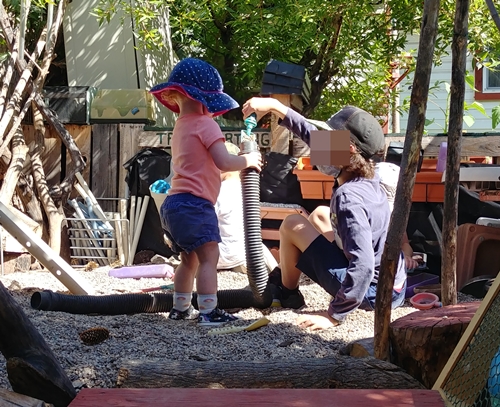
I moved the talking tube (central vac pipe) from the building area where it used to be. Now it runs along the fence from the gravel area to the water area. I also added some elbows to the pipe so the children don’t look straight through the pipe when they are talking. Not that I minded them using it like a telescope, but some of them couldn’t grasp the concept of ‘talking’ into the tube when they could see through it and would get very frustrated that it didn’t work.
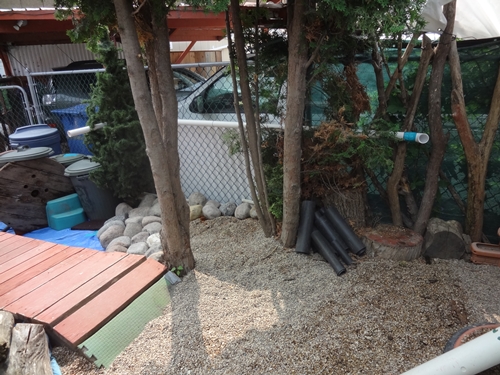
Ten foot long white pipe attached to chain link fence.

In the space where the gravel used to be is our new ‘music’ area. It is still not complete. In this picture there is nothing ‘new’, we have had the chimes, drums, and other noisy things for many years but now they are all together in a defined space. There are more turf tiles and our old stumps here for seating options. There are multiple different surfaces and items that can be used for experimenting with sound. Since this photo was taken I have purchased some Boomwackers and am collecting some additional ‘music’ making items to add in the future. (Donations are welcome if you have anything that may be useful here).
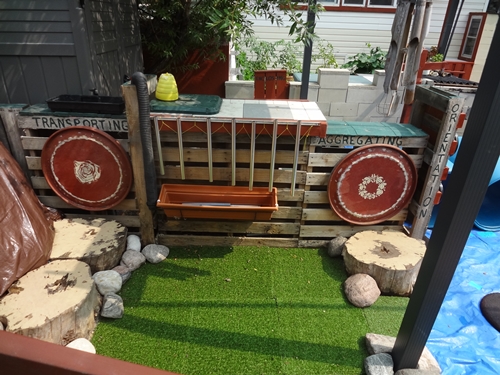
Outdoor area with chimes and drums.

View of the entrance to the music area – the Virginia Creeper has grown a lot and now covers most of the back and left side of the area – naturally containing the sounds in an acoustic chamber.

The building/construction area of the yard has not been moved or rearranged but I did purchase a large resin storage shed to store the massive amount of loose parts we have accumulated. We have far too much to have all of it out at once and our little toy shed only holds small bins and could not possibly contain all our building supplies.
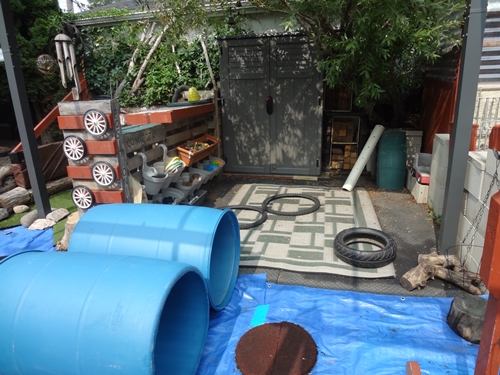
Outdoor Play area with Loose Parts for constructive activities.

A tiny peek inside the shed – this is less than a quarter of what is being stored here. Kept out of the elements but still handy when we want additional options beyond what is available in the loose parts bins.
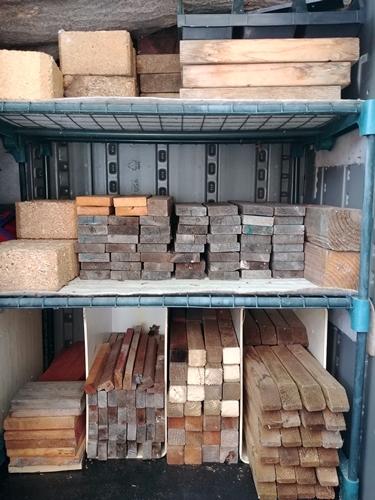
Various types of stacked wood pieces.

Sunday, October 23, 2022

Summer Recap part 2

 In my last post I covered some of the changes I had made to our outdoor play area. I mentioned that I had built a new roof over the little house in the corner of the yard and that moving the bus benches here made this a favourite sit spot all summer. However, I did not have a picture to include in my last post – but I do now;

I also promised to write more about some of our summer activities so that is what this post is for. Although International Mud Day occurs before my summer vacation, I never write about it until after. I didn’t write a dedicated ‘Mud Day 2022’ post but I can’t have a summer activities post without at least a couple mud day photos. This particular group was highly motivated to wash muddy toys so much of the activity was ‘mud on, mud off, repeat’.

Children playing in pool of mud
Children playing in mud and washing toys

The building area of the yard was popular all summer – surprisingly more popular than the water area or the climbing wall. Often, we had all eight of the children wanting to play here at the same time though they still preferred to create separate small ‘homes’ in a ‘town’ rather than work together on a single, large structure like other groups have in the past.

Children building structures with loose parts

The gravel/digging area, of course, was always popular though usually only for smaller groups at one time. It was interesting to note that, no matter what the activity was, these two were always choosing to play together. The oldest and the youngest in the group – nine years difference in age – but they played so well together all summer. Observing friendships like this is one of the things I like best about having a mixed age group.

Children pouring gravel in a tube

We also started a collection of ‘nature stuff’ to use to make mandalas. Some of the children only liked the ‘collecting’ part, others preferred simply sorting the items that were collected on our walks. Only a few actually seemed to enjoy creating the mandalas though.

Children creating mandalas with items from nature

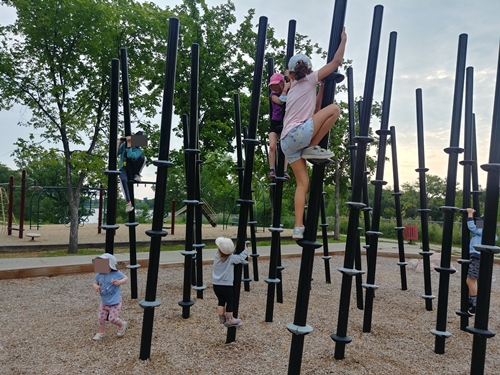
As usual, we went to parks almost every day to play tag or other group activities that require a big open space that we can’t do in my yard. I almost never take the children to playstructures but we do love the climbers they have at St John’s Park.

Children climbing poles
Child climbing rock
children on monkeybars

Whenever the basketball court was empty, the children always wanted to play line tag.

Children running on outdoor basketball court

Some of the children tried cutting tree cookies. Even though we only used small branches this was a surprisingly difficult/time consuming activity. The children who were persistent enough to cut all the way through were very proud of their achievement – so was I ðŸ™‚

Preschool child using hand saw to cut branch

Fantastic Summer!

Tuesday, July 20, 2021

Vacation 2021

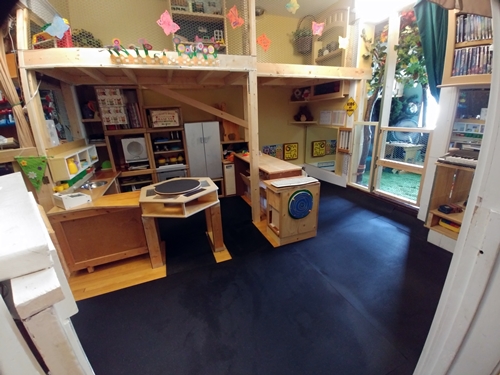
I didn’t take vacation time in 2020 so this year I was really looking forward to the time off to complete some much needed projects. I had a total of 19 days this year and five projects planned. Only one of the projects was an indoor project – replace foam tiles on playroom floor. It had originally been on my list for 2020 but then – no vacation, no reno.

I have replaced the interlocking foam tiles many, many times as a weekend project because removing old worn tiles and installing new ones isn’t very difficult. However, this time it was going to take longer as I was NOT planning on adding more foam tiles because Montgomery eats them and I don’t need more vet bills.

This time I went with much more durable rubber gym flooring. Like the foam, it provides traction and sound dampening over the hardwood floor and is so much nicer for sitting or crawling on.

My second project was not a play space but it improved access. The front sidewalk was just off centre of the front yard – two fence panels on the West side of the walkway and one fence panel on the East. There were stepping stones from the sidewalk to the front steps and side gate both located on the East side of the yard.

Now all three fence panels are together and the sidewalk is located on the East side of the yard and leads directly to the front steps and back yard gate. Bonus result is I could also expand the native prairie garden into the space where the sidewalk had been. The opportunity to add garden space means this project was more ‘relaxing’ than actual work even though the temps were about 30C every day! Oh, and we also added a garden bench because we had some extra wood! Only needed to buy a little soil and mulch, otherwise everything for this project was recycled/reused so total cost under $100 

The remaining three mini projects were all part of the full back yard renovation. The main purpose of which was to define the spaces better and improve storage for all the loose parts.

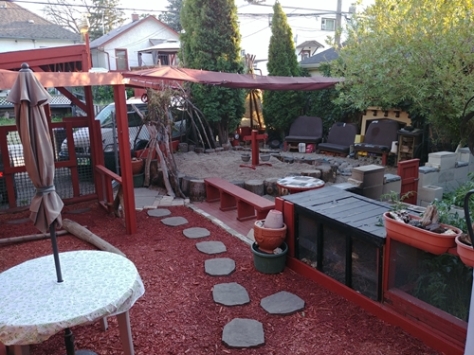
The picture below is from 2019 and shows the deep gravel ‘digging’ area on the right surrounded by stumps and the lower ‘building’ area on the left. I tried to keep the gravel in the building area level and packed – better for building on – but the children tended to dig here too, after all it was gravel.

The full back yard now looks like this (reverse viewpoint from above photo);

The logs, stumps, table, stepping stones, composter and main garden have not changed this year. The benches have been removed from the swing area, a new herb garden space was added and the mulch was replaced with turf tiles. Though part of the ‘master plan’ this project was actually completed on a weekend in the Spring prior to my vacation.

The first of the three backyard projects during my vacation was the loose parts storage wall between the gravel digging area and the new, larger building area with recycled rubber surfacing (and a carpet in case it gets too hot to sit on – though it is fully shaded). I kept the water area adjacent to the building area because the children LOVE building bridges.

There is so much more space for storing loose parts/building supplies and it is easier to access than the previous deep bins. I used pallets for the wall so more recycled wood!

Bigger items are still stored in some of the bins.

The other side of the pallet wall has new storage for the digging area which never used to have any loose parts or storage, just a few pails, pots and digging tools. Now there are so many more options.

Backyard project two was to replace the tipi – I know, everyone loved the tipi but its shape and placement were not very functional. I used the poles and covering to form a roof over the entire corner of the yard. It makes a larger ‘house’ and the tunnel was moved here too.

This is the view of the yard from inside the house;

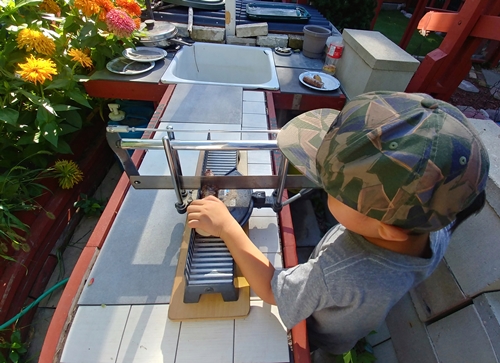
The third backyard project is the new messy play area. Located inside the garden wall it is separate from the other areas. Made from reclaimed wood, tile samples, and a salvaged laundry sink, the total cost for this project was $0. We have not used it yet (only been one day), I don’t think any of the children even noticed it as they were so excited to explore all the other new spaces. Besides, I’m still collecting some containers of ‘ingredients’ for the children to use here but…soon…


Saturday, November 23, 2019

Garden Produce

Yes, yet another post that I’ve been slow to write – there is snow on the ground and I’m writing about the garden… Well, actually, I’m writing about stuff leftover from the garden. I just used our last tomato so we have no more ‘food’ from our garden but our garden provides some wonderful loose parts that we will continue to use.

This year our sunflowers grew very well – I wrote about them already. We didn’t just get seeds and flowers though, we also got to use the big sunflower stalks in our construction area;


Sunflower stalks are very light for their size so the toddlers feel super strong carrying them about. They make good bridges and paths;


Other popular loose parts we get from the garden are the beans. We usually grow several different varieties of beans. Some of course are grown to eat but the scarlet runner beans we grow for fun. This year there were some pretty impressive beans;


Taking the seeds from the pods is a very popular activity – partly because many of the toddlers love disassembling stuff (disconnecting schema) but it is also great for developing fine motor skills.


We were surprised to discover that the biggest pods did NOT contain the biggest seeds. The variety of seed colours and sizes is also very interesting.


These ones we brought inside to add to our seed collection to plant in the spring. We have many more out in the yard – they get used as ‘ingredients’ for potions, sorting by size and shape, transporting in pails and trucks, land art, and so much more. Sometimes we even discover bean plants growing in random spots outside of the garden. Wonder how that happened? 🙂

Saturday, August 3, 2019

Vacation 2019

Another two week vacation, another big outdoor project – perfect! But before I tell you what I did on my vacation I’ll give you a little yard history.

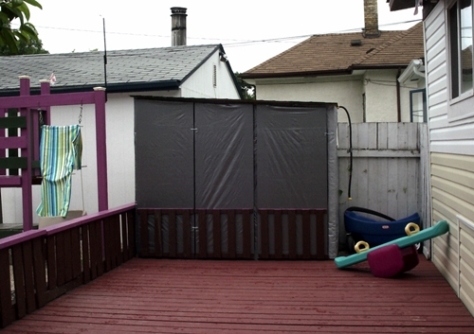
The upper deck existed before my childcare home opened. It separated the South facing backyard from the East facing side yard. The side yard was the dog’s yard and the vast space under the upper deck was her dog house. The play space in the back yard consisted of a 300 sq ft gravel area with a play structure and a 360 sq ft ground level deck. The outdoor toys were stored in a tarp wrapped wooden frame shed built against the West fence.

There was no back wall on that little toy shed because it was positioned against the fence. It was about 15 years ago that we moved the toy shed so we could use that spot for our first garden – it was the only spot in our back yard that was not deck or gravel. We then attached the toy shed to the South side of the upper deck where the open back allowed us to extend the toy storage to the space under the deck (after we made the dog house smaller).

The tool/garden shed was located by the carport – South of the lower deck and East of the gravel area. When we decided we needed a bigger garden space, we took the tool shed apart and rebuilt it ON the rarely used lower deck and attached it to the front of the toy shed. We then put in a bigger garden where the tool shed had been.

This picture was taken many years ago on the upper deck;


The shelf and framed white panel on the right side is the back and top of the old toy shed. The higher redwood wall beyond it is the back of the tool shed. Not visible in the picture – back door of the house behind me, stairs down to the back yard on the right, and stairs down to the side yard on the left. Also not shown is the bike shed which is in the side yard attached to the North side of the upper deck.

We had created ‘Frankenshed’ – it had a very large foot print but inefficient storage. You could enter the bike shed from the side yard, then crawl under the upper deck, go through the toy shed and then go out the tool shed into the back yard. However, it wasn’t a convenient path – more like a labyrinth where there was the possibility you could be lost for long periods of time. Sometimes when the children asked for toys that were stored I would tell them I’d see if I could find them on the weekend. I was never sure how long it might take me to find the toy and get back out of Frankenshed.

The only good way to get from the back yard to the side/front yard was by going over the upper deck. Even the lawn mower, snow blower, bikes and lumber had to be taken this way. It was frustrating at times. When the children and I were out in the back I couldn’t see the front gate because the upper deck and Frankenshed blocked my view. Consequently we rarely played outside later in the day when there was the chance parents may arrive.

So, on my vacation we;
  • built a new tool shed in the side yard
  • sorted all the stored items from all the sheds
  • took apart the garden shed, toy shed, potty house and bike shed
  • removed half of the upper deck and one staircase and moved the other staircase
  • built a new toy shed and a new garden shed/potty house
  • disassembled, repaired and reassembled the garden wall
  • created a new ground level walkway

We worked outside for 10-12 hours each day of my two week vacation. It was wonderful! Now I want to spend even more time outside in the yard. Some of the changes are actually quite subtle but almost every part of the yard has changed at least a little bit so I’ll include before and after pictures for each corner of the back yard.

NW yard in 2018
 
NW yard in 2019
 
The old potty house – by the water barrel in the back of the garden – was used only for potty training toddlers who couldn’t make it inside quick enough. Now that area is our new convenient toy storage shed.

SW yard in 2018
 
SW yard in 2019
 
Picture angle is slightly different due to the movement of the stairs so the entrance to the back yard is now six feet farther East. Many of the stumps, stepping stones and tables have been moved too.

SE yard in 2018
 
SE yard in 2019
 
Again, stepping stones, stumps and table moved. Added rope swings and removed sensory bins – the bins now have a spot in the gravel area with the toys instead of being in the active play area.

Construction area & kitchen
 
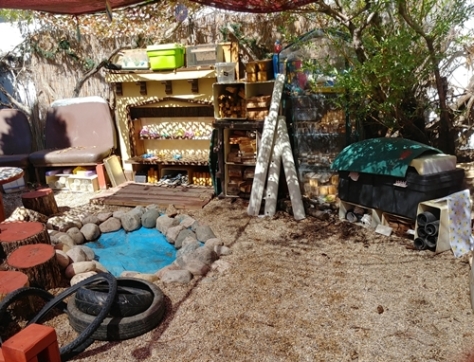
The pond was moved to make room for a larger loose parts/construction area. In the old fireplace mantle we added shelves for storage of dishes & pots which never had a dedicated space before. There is also a counter which can be used for ‘cooking’ but can also hold the sensory bins when we want to use them.

NE yard in 2018
 
NE yard in 2019
 
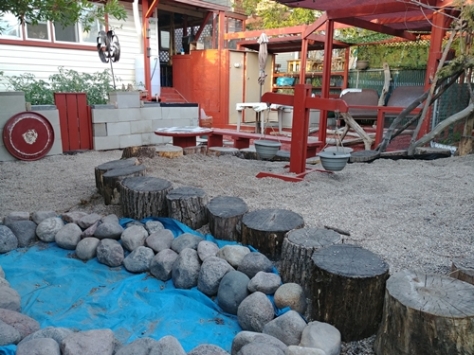
Here is where you see the biggest difference. The cinder block garden wall was originally built on the wooden cribbing for the gravel area. The wood was deteriorating and sections of the wall were tilting in different directions. The wooden cribbing was replaced with an additional row of cinder blocks. I doubled the size of the awning so we have twice as much shade. The ‘pond’, rocks, table, stumps etc were rearranged to create a larger construction area and make room for the sensory bin area (not visible in this picture).

The stairs and a portion of Frankenshed were visible in the 2018 photo but in the 2019 photo there is only the smaller garden shed/potty house. This new little shed was built entirely from wood salvaged from the old shed and deck. The potty shed half is large enough for diaper changing and also has running water.

This next picture shows my view from the bench by the carport – on the East side of the garden shed I can now see all the way through the side yard to the front gate! The ground level walkway (also built from recycled deck boards) has enough space for the art table which used to be on the upper deck and was not visible from the yard. There is a small gate beside the garden shed to prevent any of the littles from wandering into the side yard which is still not a play area.


That’s enough writing for now – I’m going outside to play…